

Zeropark is one of the most well-known redirect/pop sources in the performance marketing community, and they now offer push traffic too.
Integration is simple and easy, especially if you use our templates.
Step 1 - Add Zeropark as a Traffic Source
Head over to Traffic Sources > New > type to show our templates and pick Zeropark.
You will notice the tracking field and conversion tabs flash, indicating that data there has been changed 😉
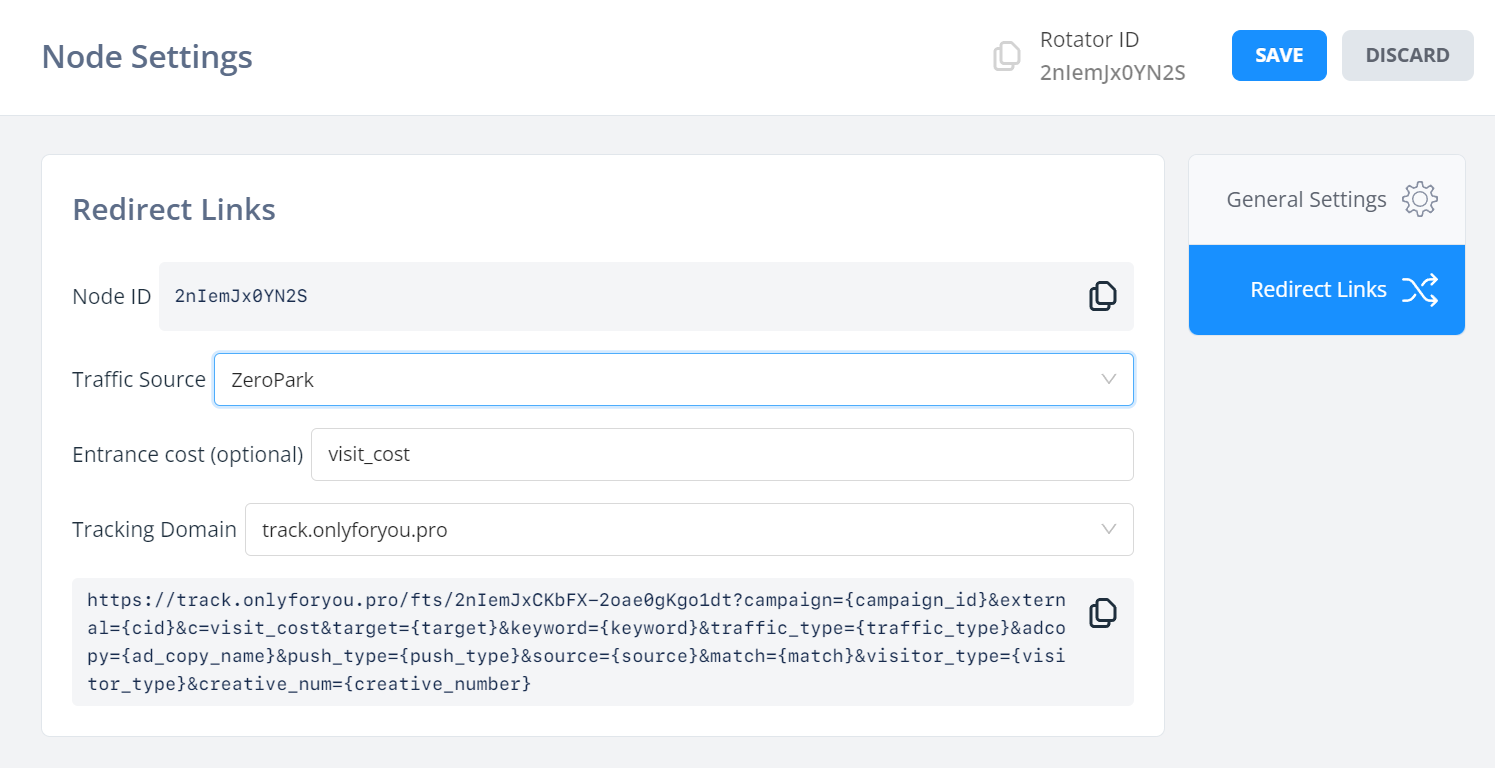
In the tracking field section we have populated fields and tokens to pass from Zeropark, like so:
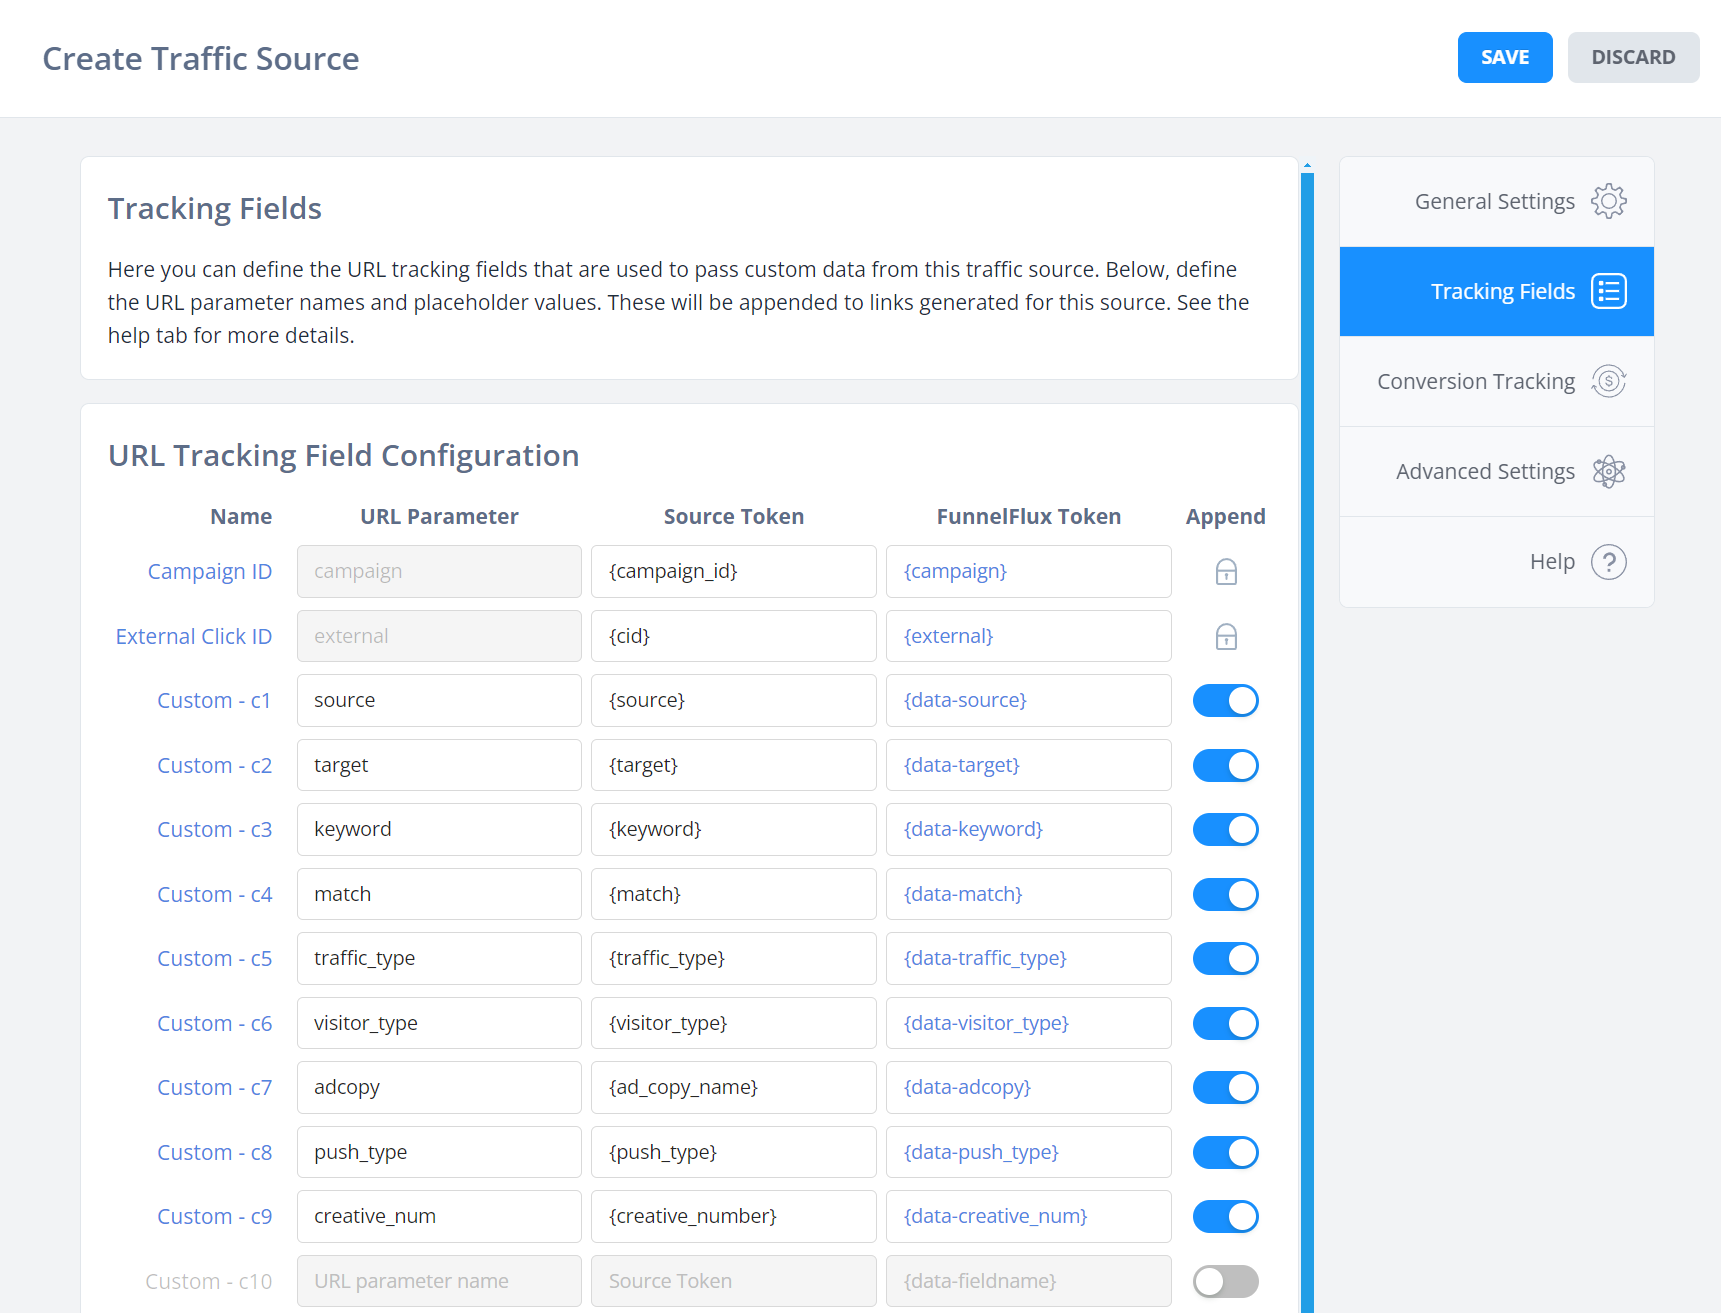
Note that the available tokens differ slightly depending on the traffic type you choose, but the above cover all traffic types well. We don't pass things like OS, country etc. as FunnelFlux already resolves these internally -- there is little value in logging such similar data in FunnelFlux.
In the general settings tab, we have also added {visit_cost} as the token for cost per entrance. Please note that cost passing on most traffic sources also depends on the traffic, ad and bidding model -- sometimes it cannot be passed.
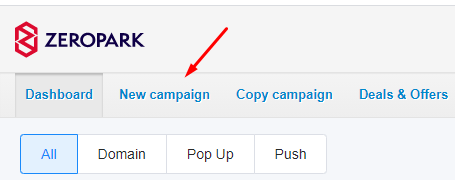
Step 2 - Create a Campaign in Zeropark
Setting up a campaign in Zeropark is very easy.
Click new campaign:
Pick your traffic type:
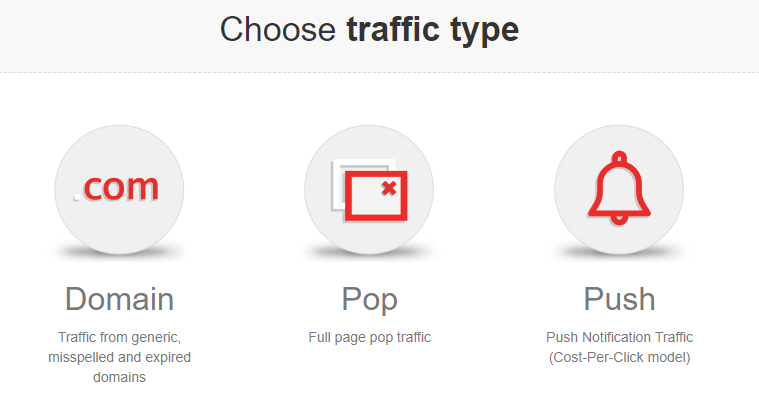
Then fill out the various targeting settings.
Two important parts here involve FunnelFlux -- the campaign URL and the postback URL for conversion tracking.
Let's deal with both of these!
Step 3 - Conversion Tracking
To get set up, click pop traffic > RON > just to get to the next step where we can get our postback URL.
What we need is the ID unique to your account, which we can put into our FunnelFlux template.
Scroll down to this section:

Here you can select "Other" as the option. Note the FunnelFlux option present is for our old, self-hosted tracker. You can pick it if you want -- it won't change anything as we are not going to use this URL, just get a specific ID from it.
If you pick other, you will be given a URL like this:
http://zp-postback.com/zppostback/ff776d65-577b-4240-af21-e11574822cca?cid=
Here, we just want the ID part at the end:
ff776d65-577b-4240-af21-e11574822cca
Now, go back to the traffic source config in FunnelFlux and go to the conversion tracking tab:
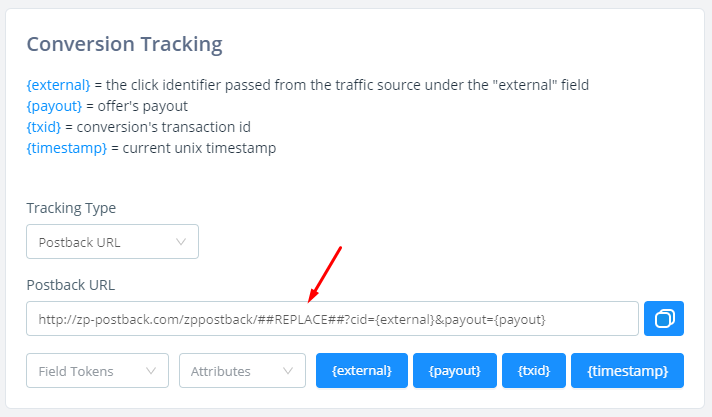
Here, we want to replace this ##REPLACE## part with our ID above, giving this:
http://zp-postback.com/zppostback/ff776d65-577b-4240-af21-e11574822cca?cid={external}&payout={payout}Once that's done, save the traffic source configuration.
Step 4 - Creating a Tracking Link
Now that you have the traffic source created, build a funnel of any type. Lets assume you're sending traffic to a lander followed by an offer:

Now, click the traffic node > redirect links tab, and pick Zeropark as the traffic source:
This will provide you with the link to use for sending people to the traffic node (which is a rotator, and the default starting point of funnels).
You don't need to save these settings or this link, you can get them at any time by clicking a node in your funnel -- they are dynamic, not fixed links that have to be saved.
Now, open this link in a new browser window to test that it works -- make sure to save your funnel first!
Once you have confirmed it works (always test your tracking), you can paste it into Zeropark as the destination URL:
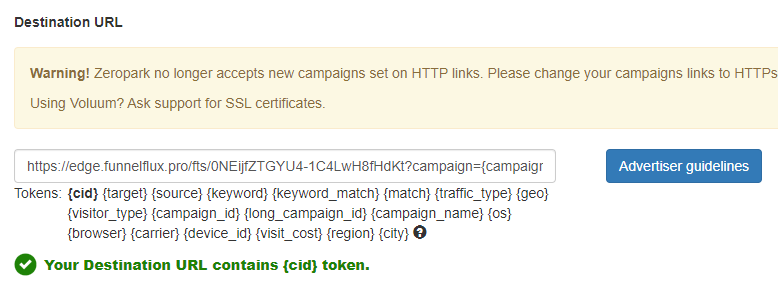
You should see this green tick from it detecting the {cid} token being passed.
If you chose Pops you may be using their newer UI, where you would use this as the offer URL, like so:
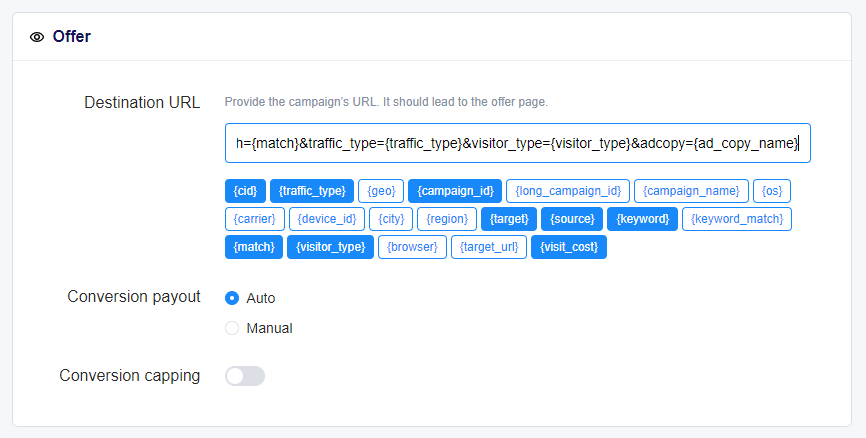
Once you submit your campaign and it gets traffic/conversions, conversion data will be passed to Zeropark automatically.
And that's it!
Optional - Updating Costs
If you aren't able to pass an accurate cost per click, you may need to manually do a cost update in FunnelFlux.
This is pretty easy provided you are passing campaign IDs and a useful segmenting value like source (as in our template).
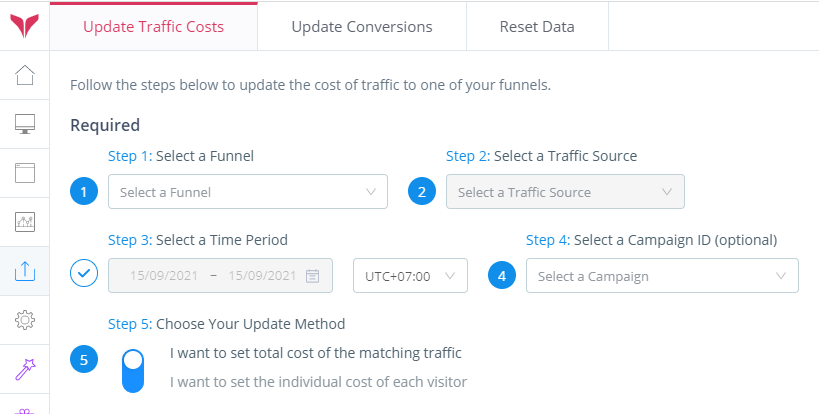
In FunnelFlux, go to the Update Costs section. We want to fill in details here to match an export from Zeropark, and then use the advanced mode:
Now, we need to export data from Zeropark to CSV/Excel, to build a nice package for import.
It has been a looooong time since I have run any traffic as an affiliate, so forgive me for not having great data.
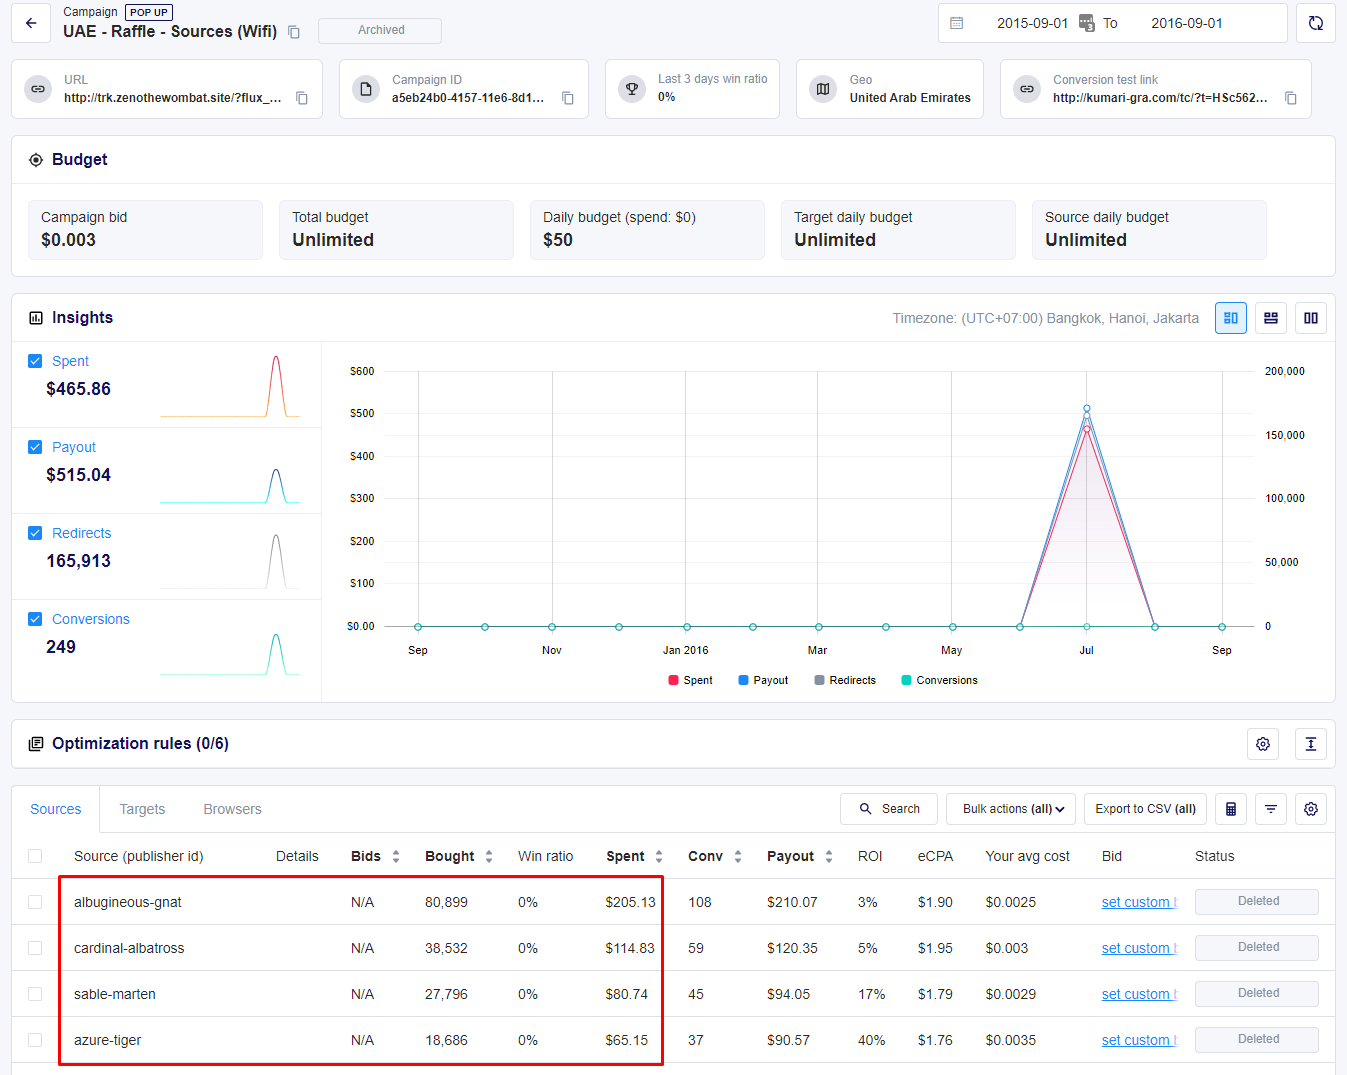
Here's an age-old campaign where I have some sources with different costs, where I want this cost data to be accurate in the tracker:
Let's build an import for FunnelFlux.
- Figure out your Zeropark timezone. It will be in your account settings. You will want to pick the same timezone in the Update Costs section of FunnelFlux.
- Set your report windows to be the same. You could use "Yesterday" and do daily uploads, or upload data from a wider window. It's up to you.
- Note the campaign ID. It's in the URL, and you can copy it at the top section. We are automatically passing this to FunnelFlux as the "campaign" attribute, so can select it from the optional campaign dropdown.
- Now, export the current table. It will send this export to the "Exported Reports" tab in the main Zeropark dashboard. Find and open this file.
Opening that file in Excel, I get this:

What you do next is re-arrange it to have cost as a column on the left and your tracking field (source) values in the next column, like so:
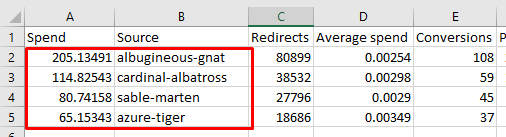
You can ignore the other columns. In a few moments we're going to copy/paste the red box into FunnelFlux.
Now, head back to FunnelFlux and make sure you pick your date ranges, funnel, traffic source, timezone, campaign etc.
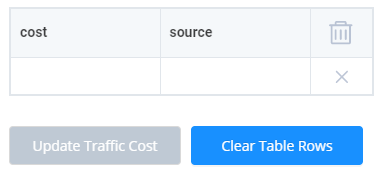
Scroll down to the options section and pick Advanced Mode:
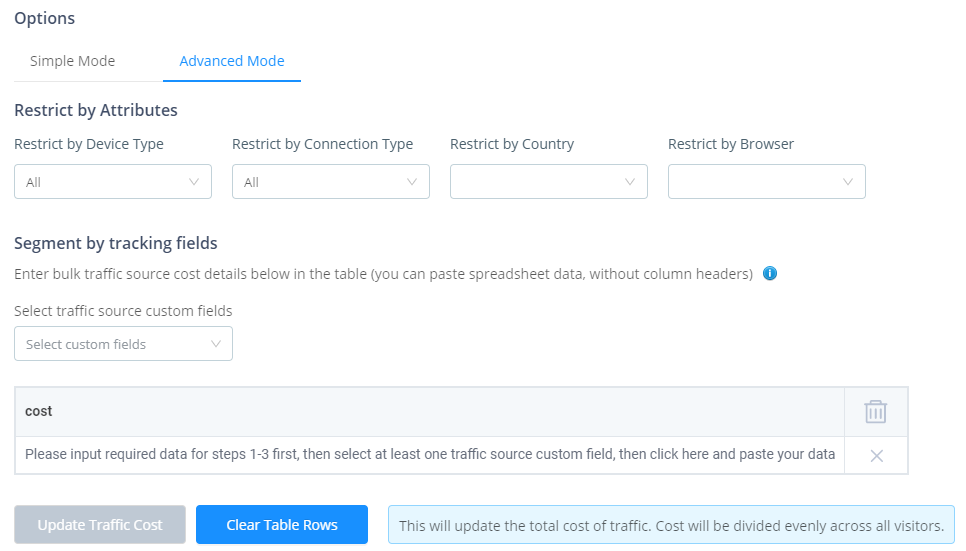
Looks a bit overwhelming? Don't worry, this is actually pretty easy.
From the custom fields list, select "source" since that is the field we are passing these source names to:
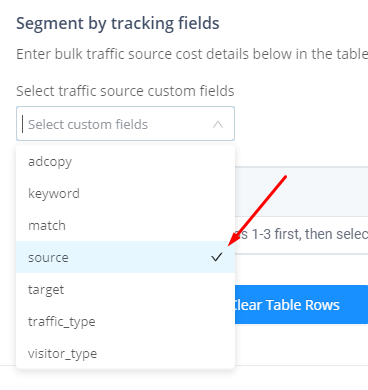
When you do this the table will appear with the cost and source column.
Now head back to Excel and copy the red box region, i.e. your list of cost and sources, then come back to FunnelFlux > click once in the top-left cost box (it will turn blue), and hit Ctrl+V or Cmd+V to paste.
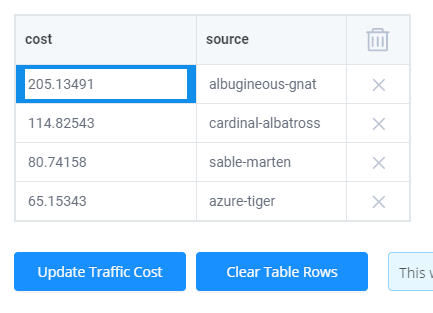
Now that this has pasted fine, you can click update traffic cost. Our system will then go through your settings and find visitors matching this source, then apply an average cost to all of them, bringing your costs in line with Zeropark.
NOTES:
- Try not to submit cost updates of more than a few hundred rows, or it can get a bit crazy -- these updates are quite resource intensive, so trying to update 10,000+ zones with $0.0001 spend each is problematic. We'll update our system in the future to make these uploads easier and block actions that are "crazy"
- If you do have tonnes of zones, pubids or similar, you can instead do an update by something broader first, e.g. ad ID, and then do a second update by zone IDs where you only include the ones that actually have clicks, or have spent above a certain threshold -- so that you only upload data that's actually useful and won't try to create an onerous amount of updates
- These updates rely on what data you pass to the tracker. You can't expect to update by "zoneid" for example if you aren't passing this from the traffic source.