

- Richpush is a traffic source that provides push, popunder and native ads
- They are based in Belarus but have global support
- You can find more info at their website, Facebook page, Telegram group or you can email [email protected]
- Depending on your topup amounts, you will be granted different levels of service (such is the case on many traffic sources now)
Please note traffics sources may change their tracking options from time to time -- if this article is for any reason outdated or you find errors in it, please let us know.
Step 1: Adding Richpush as a traffic source
Firstly, add Richpush as a traffic source. You can use our available template:
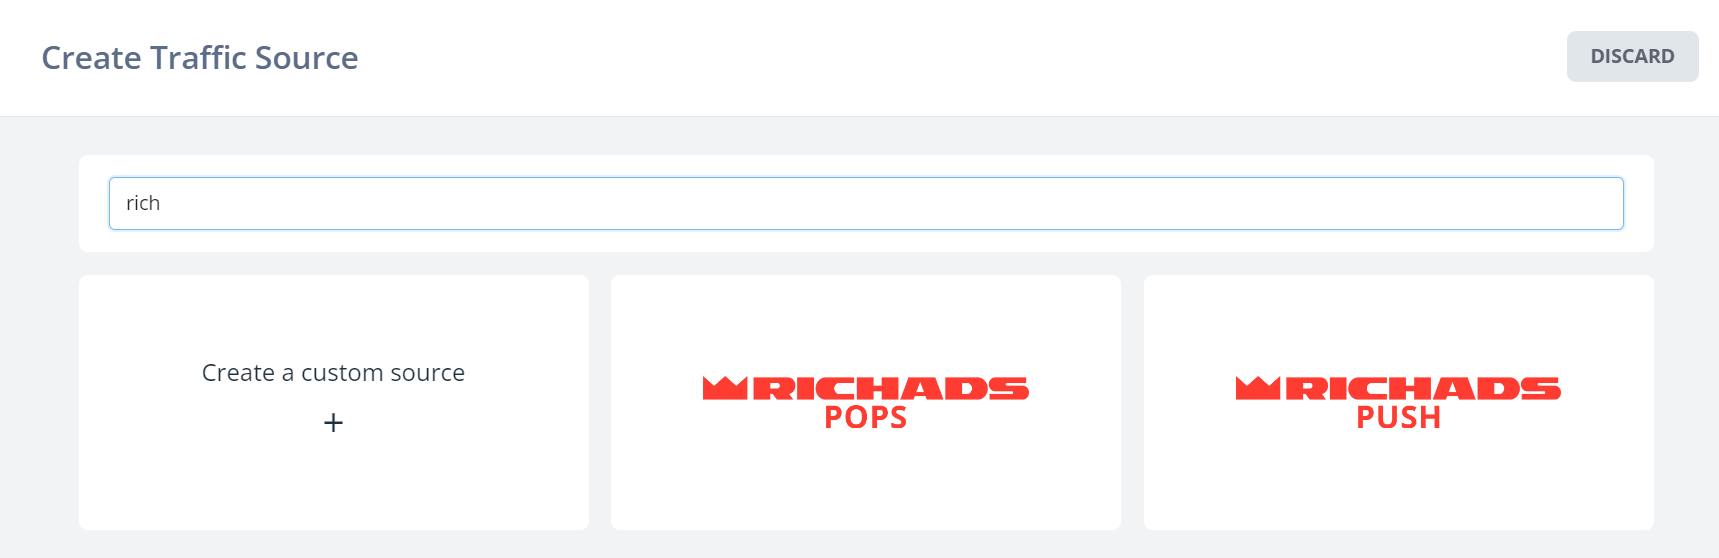
Note the above is tailored to their PUSH ad type -- you may need to duplicate your source and modify it a bit fro
We will come back to the conversion tracking later as its a little unique.
When you are ready to create a campaign, simple go to your funnel builder > click the traffic node > get links and pick Richpush as the traffic source.
Step 2: Setting up a campaign
Head over to Richpush, sign in and click create campaign.
Note: if you use an Adblock plugin, try to whitelist all of richpush.com and any other related domains, as the blocking plugins can mess with their site.
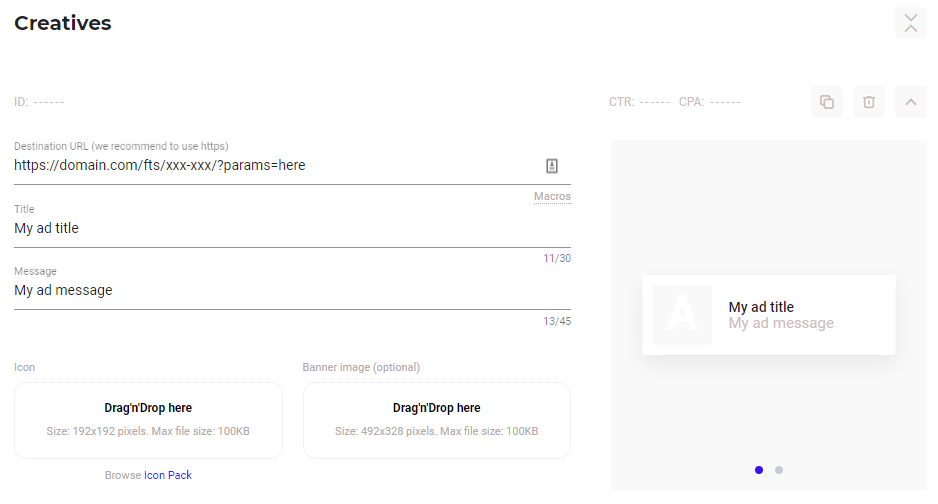
Here I am creating a simple push ad, using the URL that I get from the Funnel Builder > clicking the traffic node > get entrance link.
You can make multiple creatives and use the same link for them all as it will dynamically pass creative/campaign IDs to FunnelFlux.
Step 3: Adding conversion tracking
RichPush offers postback-based conversion tracking for all campaigns, providing a Main Conversion as well as an Approved Conversion.
In other words, leads and sales, which are common with a lot of offers run on push traffic. They also have a landing page pixel which you can manually place on your landers -- you will need to do this separately to FunnelFlux tracking.

Note in the main/approved conversion, the only difference is the "action" is conversion or conversion1.
Also note that the above URL is a template from their side for original FunnelFlux, its not actually correct for FunnelFlux Pro (see below).
Given the above, I recommend this configuration for the conversion tracking part as a default:
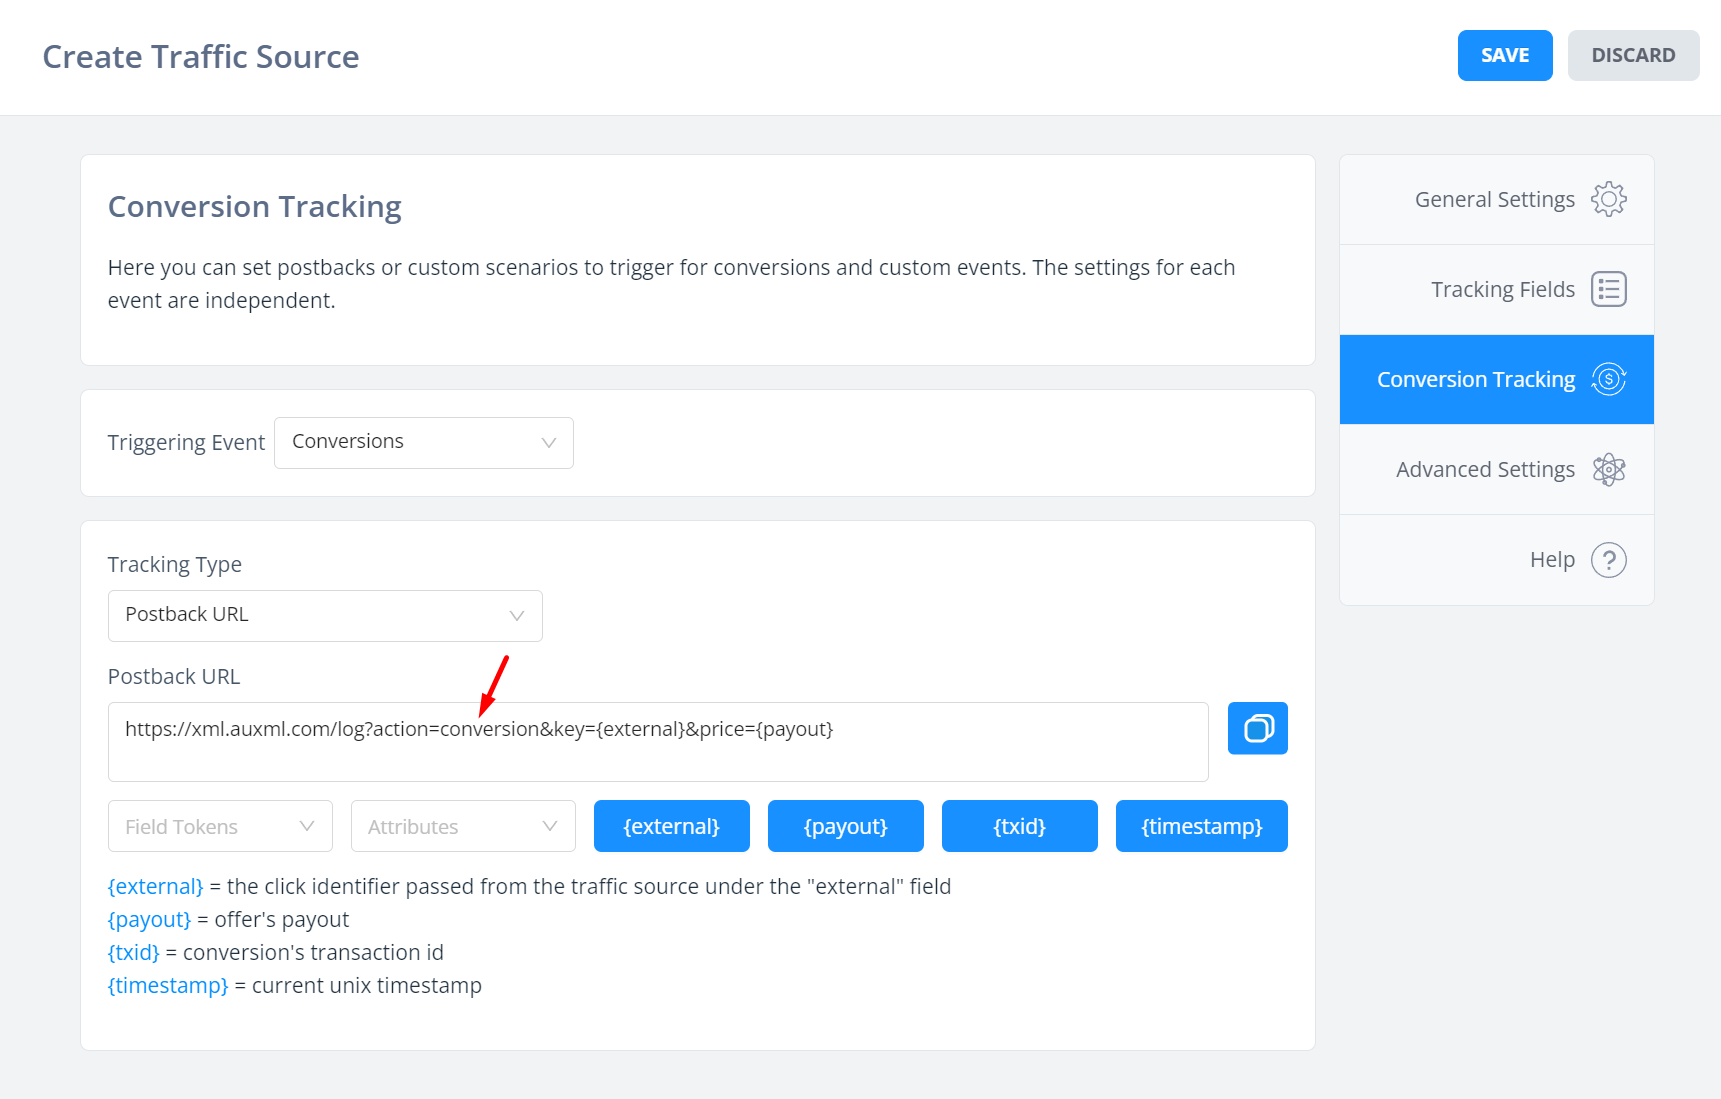
And then this URL if you have both leads and approved sales happening:
http://xml.auxml.com/log?action={txid}&key={external}&price={payout}Note here I use the transaction ID as the action.
So, in your network/offer provider, when conversions happen, send a tx value in the postback/conversion of "conversion" for leads and "conversion1" for sales.
This is a little bit clunky to be frank, so we will be adding custom conversion overrides to funnels soon.
With these you'll be able to override the postbacks at a funnel level and do things like "if payout < 5 --> send this postback", so that its easier to send these separate leads vs approved conversions.