This article covers how to set up FunnelFlux to send conversion data to Google Ads using their API.
Please note this integration has the following limitations:
- If you have multiple accounts, you will need to make a separate traffic source in FunnelFlux per account so that you can set different account IDs in the custom scenario config
- Google Ads does not allow pushing conversion data until at least 6 hours post-click. So there is a minimum delay of 6 hours before a conversion will appear in the Google Ads UI, though it will have the correct conversion time there.
- Not a limitation of our integration itself, but we highly advise you set conversion goals to count "Event event" in their options, not the "only once" option. Only once is not supported when using Google's new wbraid/gbraid click ID parameters. Setting a conversion goal to only once mode will result is a significant % of your conversions being rejected via API.
Getting the Google Ads Info You Need
Firstly, go to make a new traffic source in FunnelFlux Pro. Type in the name field and pick the Google Ads template.
Now navigate to the conversion tracking tab. You should see this:
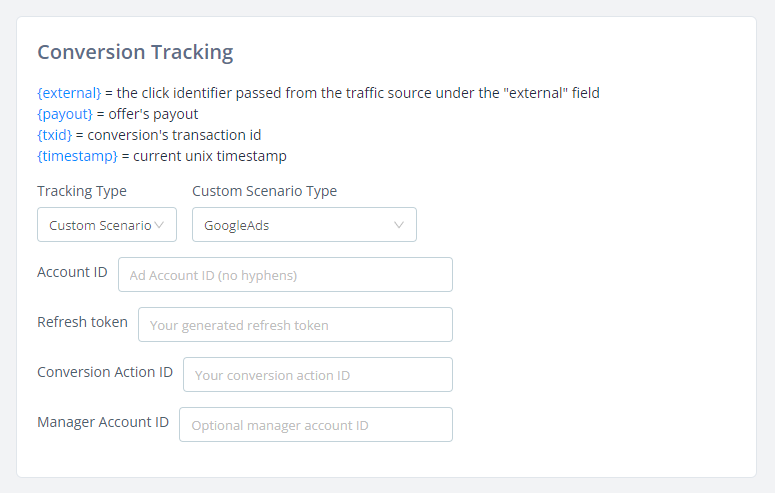
So, we need to get a few pieces of info:
- Our Google Ads account ID
- A refresh token (will generate later)
- A conversion action ID
- Optionally, a manager account ID -- you will need this if you are using a manager account where the ad account is a sub-account of the user you're logging in as (you'll usually know quite clearly if this is your situation).
Google Ads Account ID
Log into your Google Ads account, and from here find the ad account ID.
Generally it will be up in the selection menu:
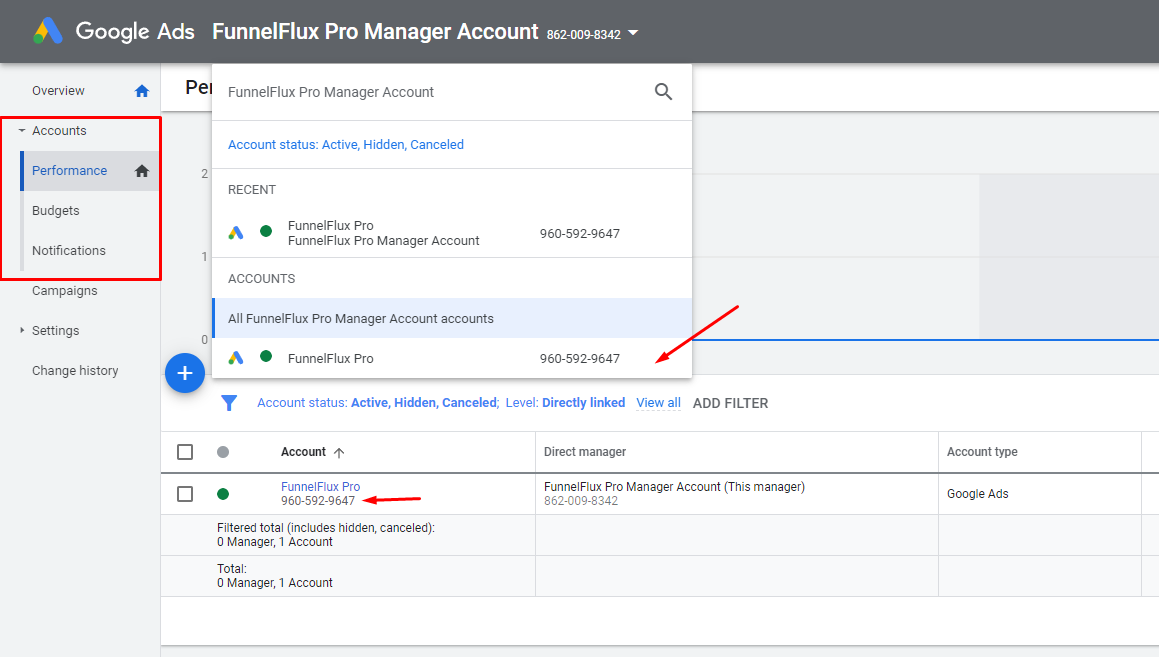
It will be a 10 digit number like above. Put it in your custom scenario config, without the hyphens.
Above you can see I have a manager account, and it shows the manager account ID, which is the optional ID I might need.
You can access the accounts list at https://ads.google.com/aw/accounts
Conversion Action ID
This one is quite annoying to source, honestly!
For this, you need to make a new conversion action for your ad account that is purposed for offline conversion uploads, and then get its ID.
Under Goals > Summary, you need to create a conversion action:
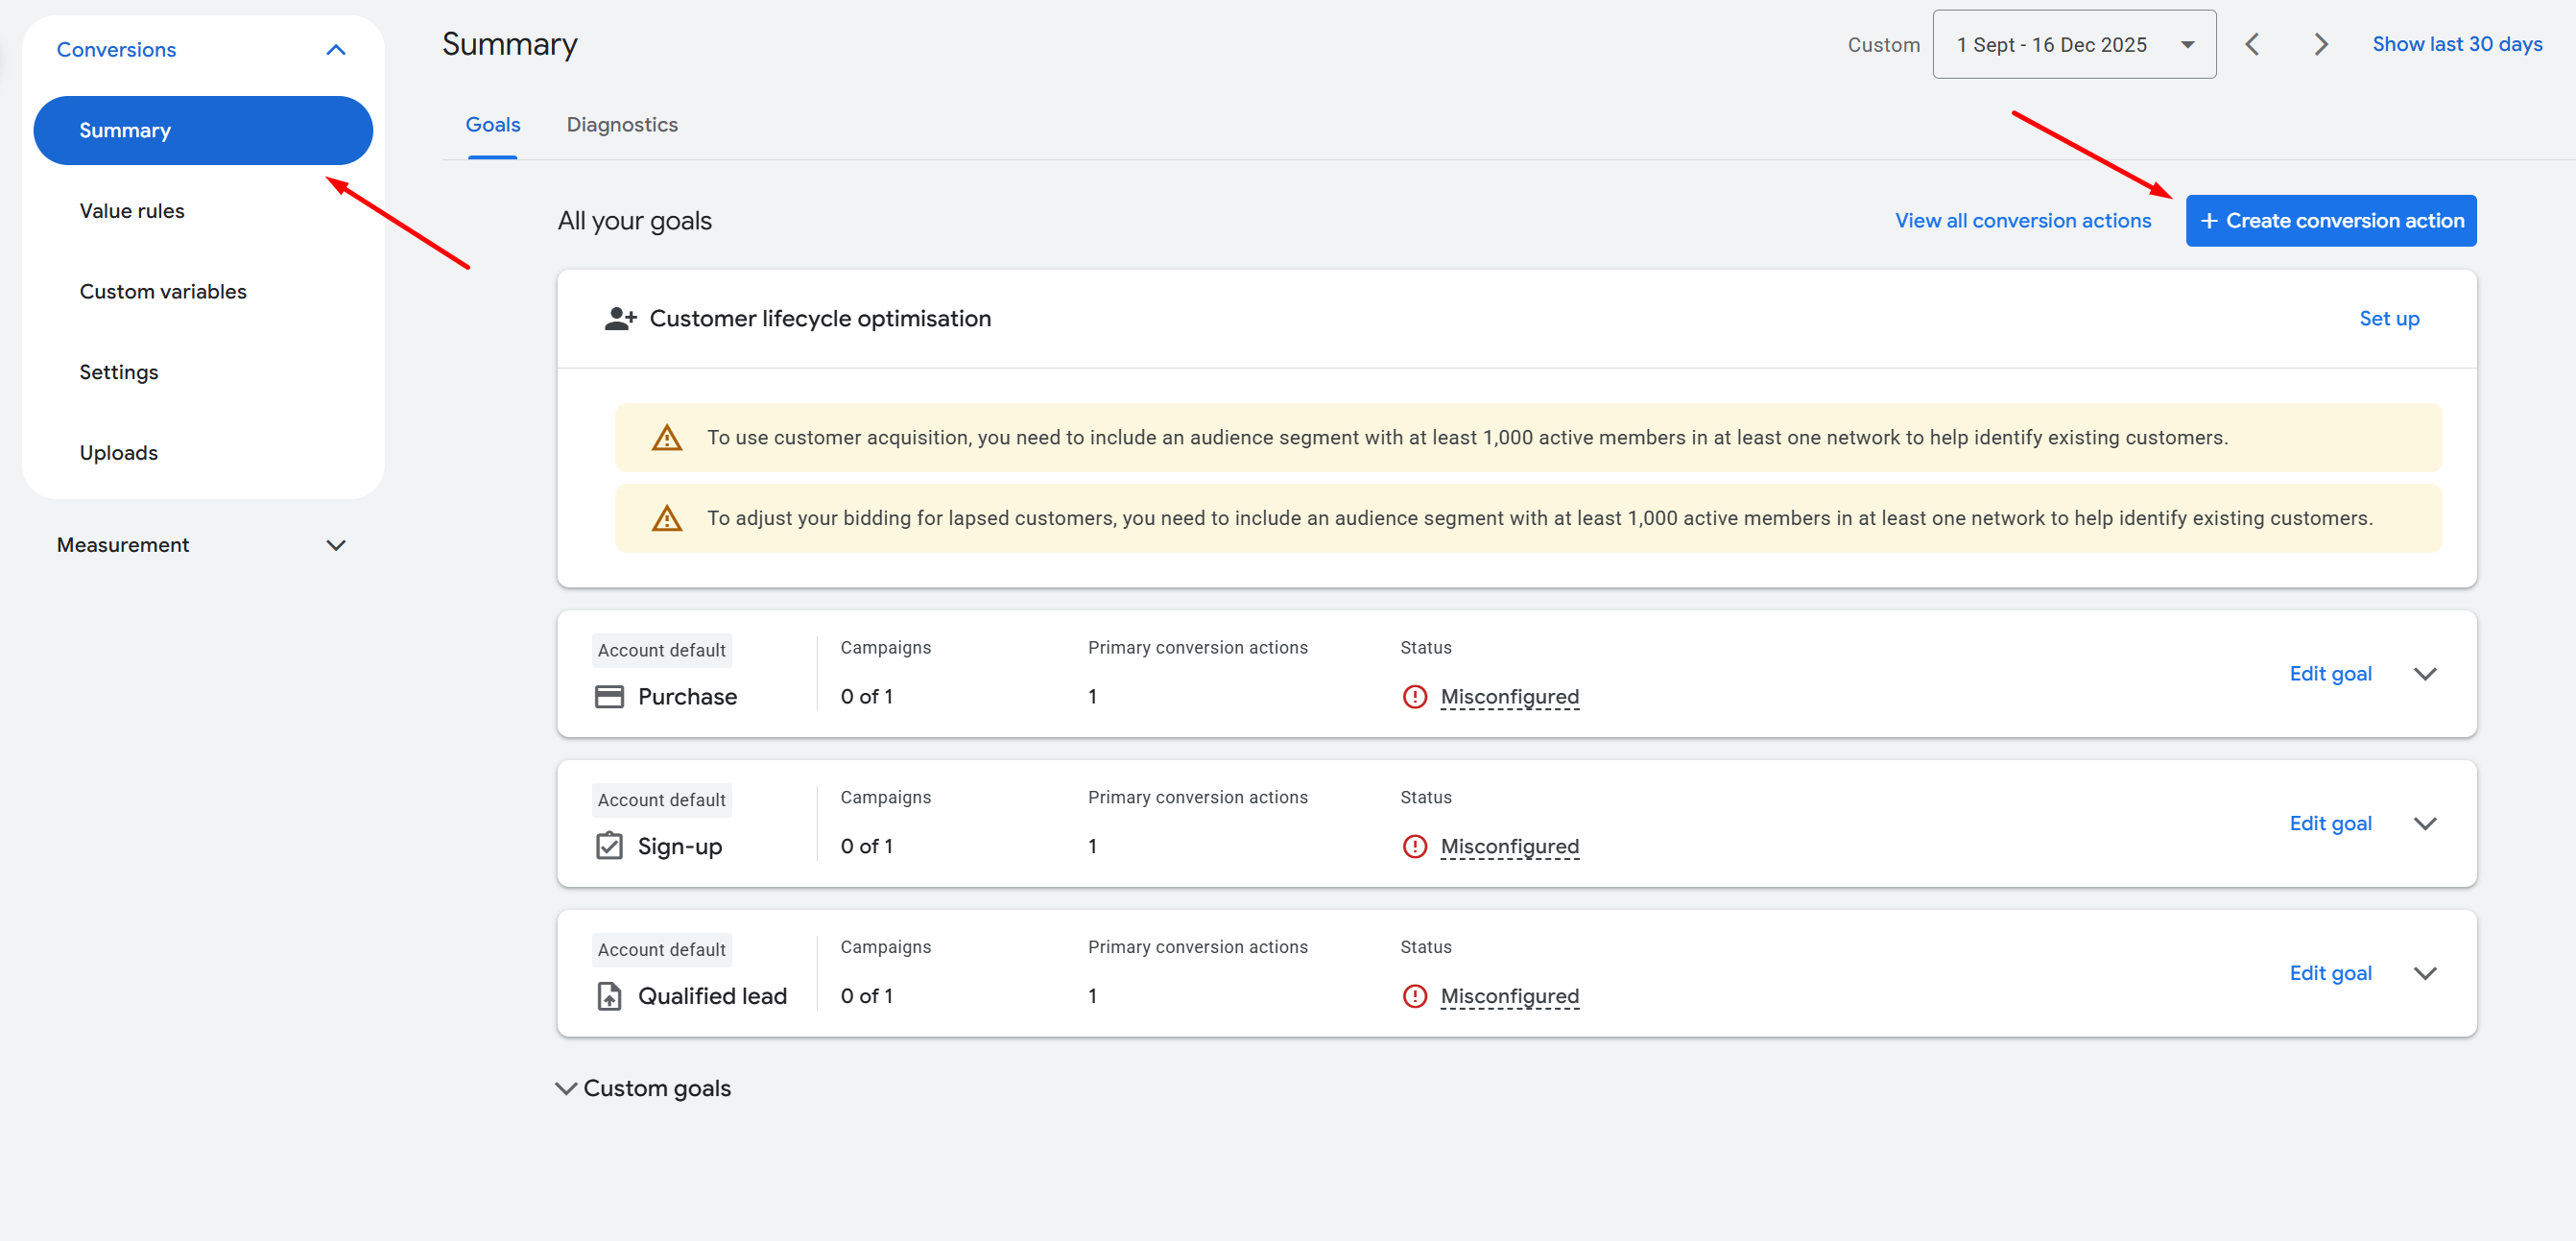
Make sure you have selected the correct ad account from the drop down menu when you access this section - as conversion actions are specific to each ad account.
Click the [+Create Conversion Action] button to make a new conversion action.
Select Conversions offline and click add data source:
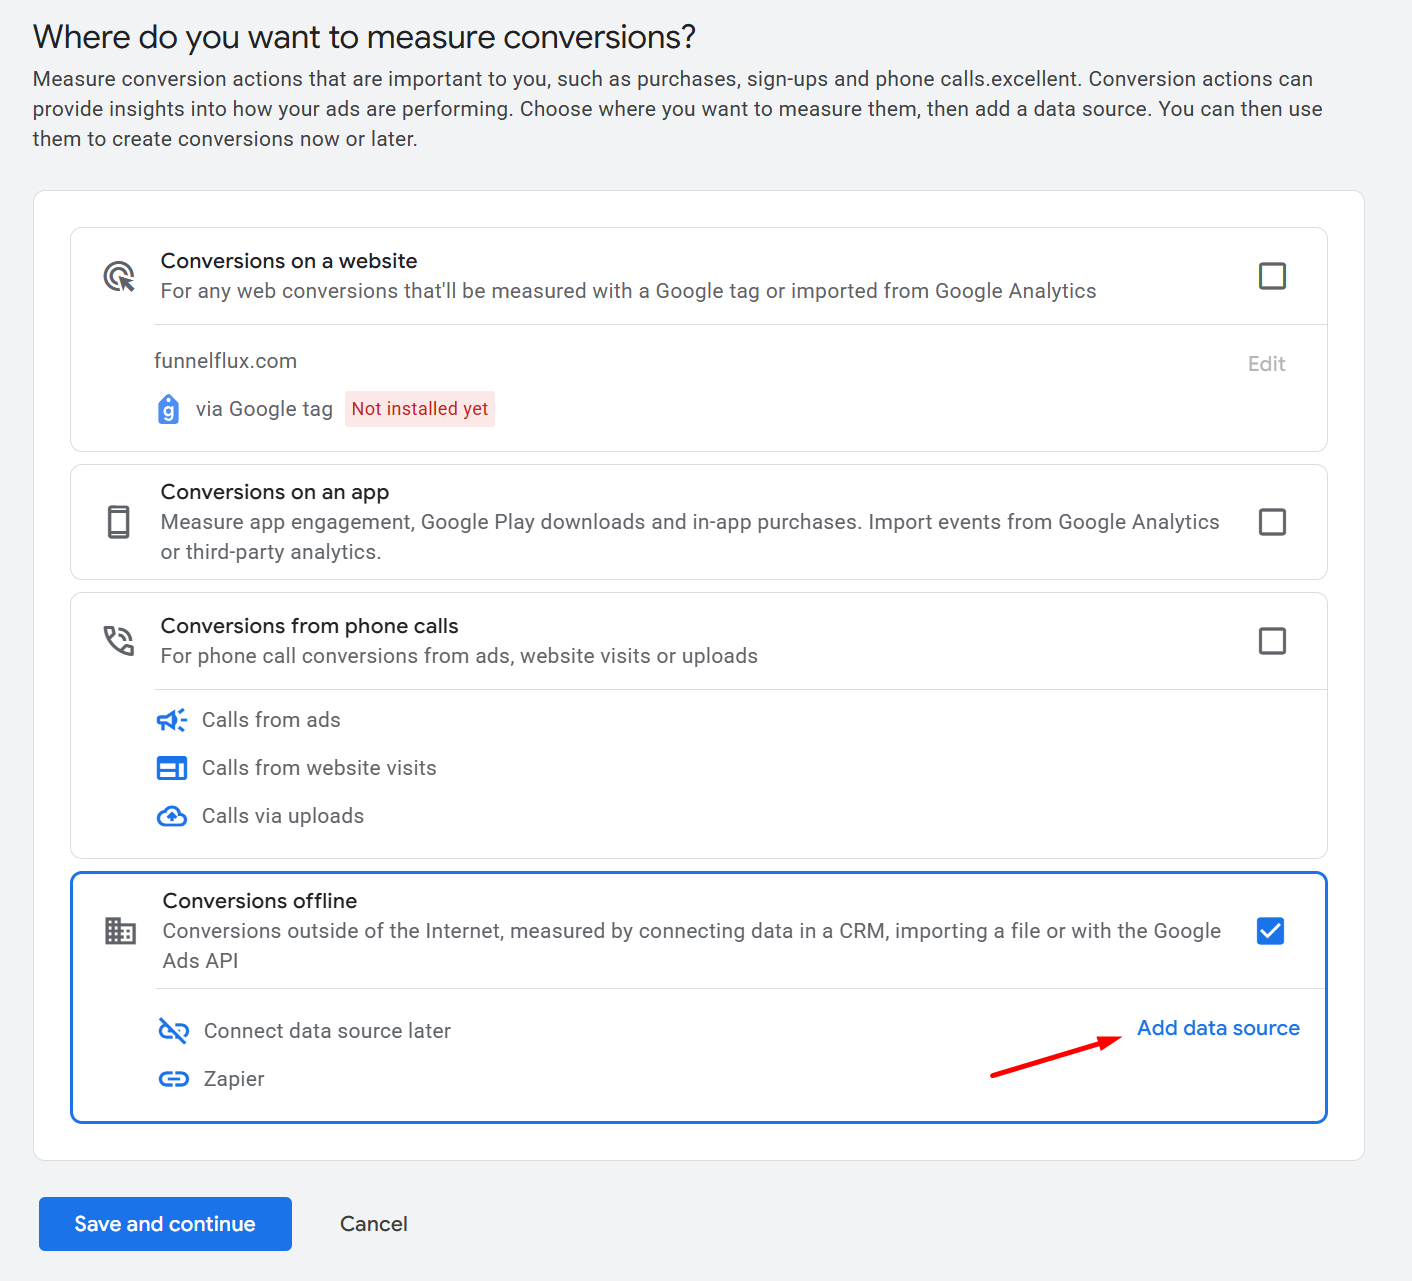
On the next step, choose to setup later, check the box and click done:
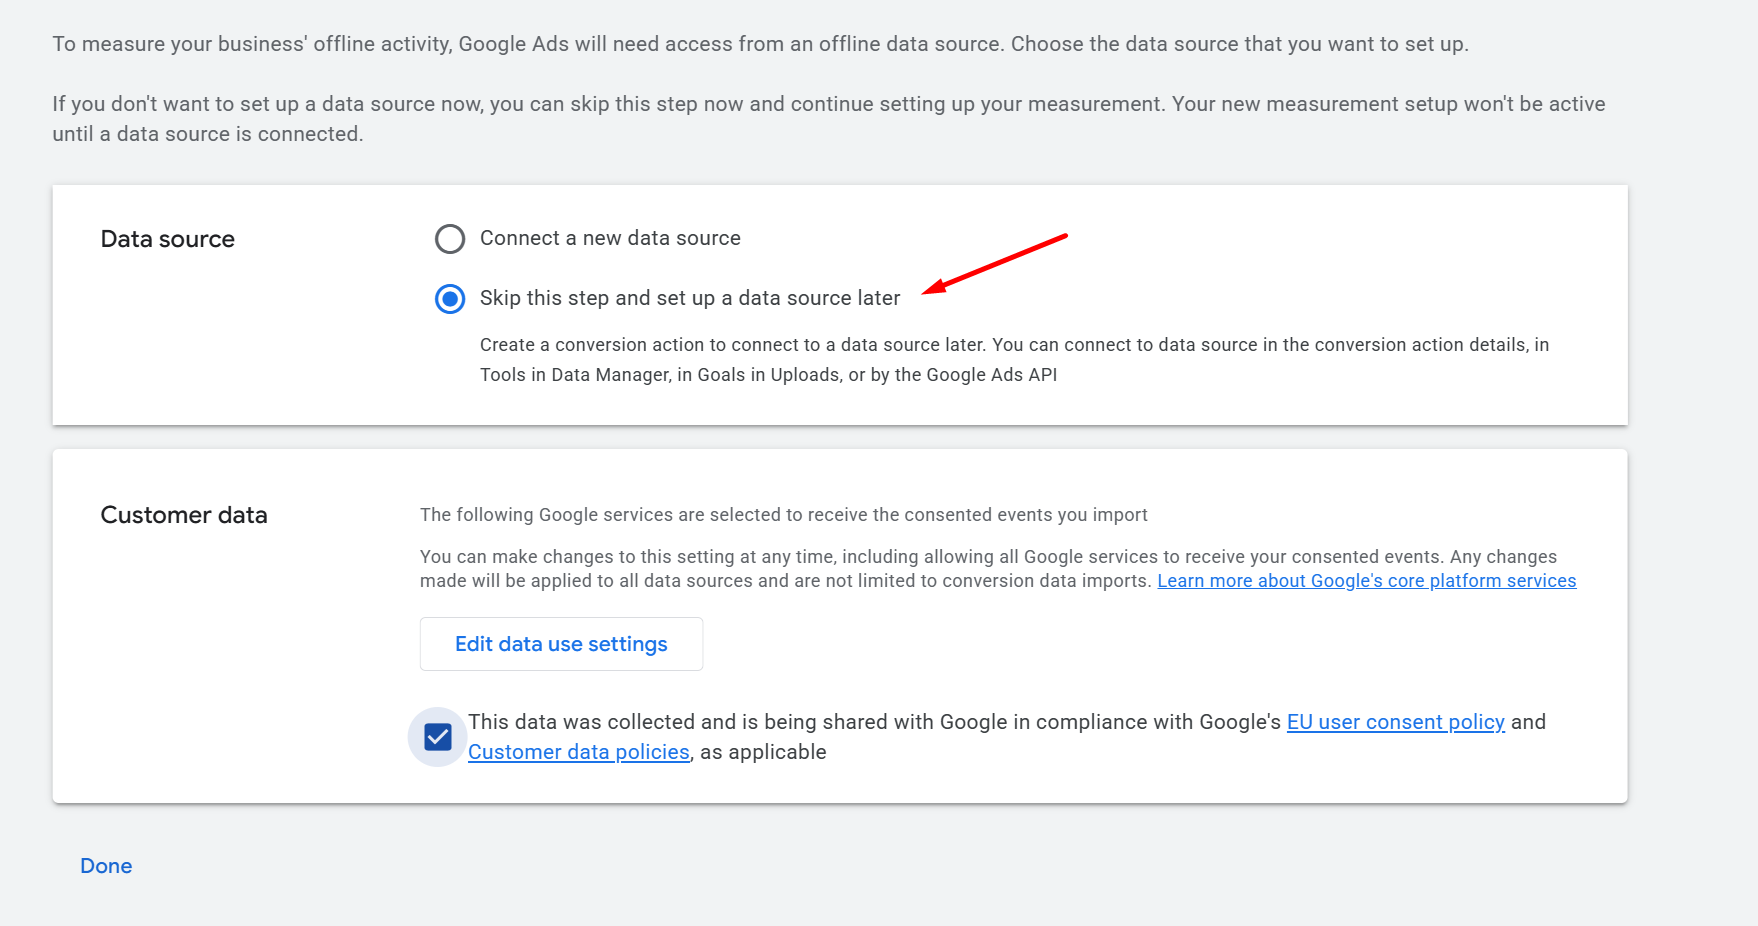
From there, click continue and you should see a page like below. Pick the appropriate event type for this goal (e.g. purchase):
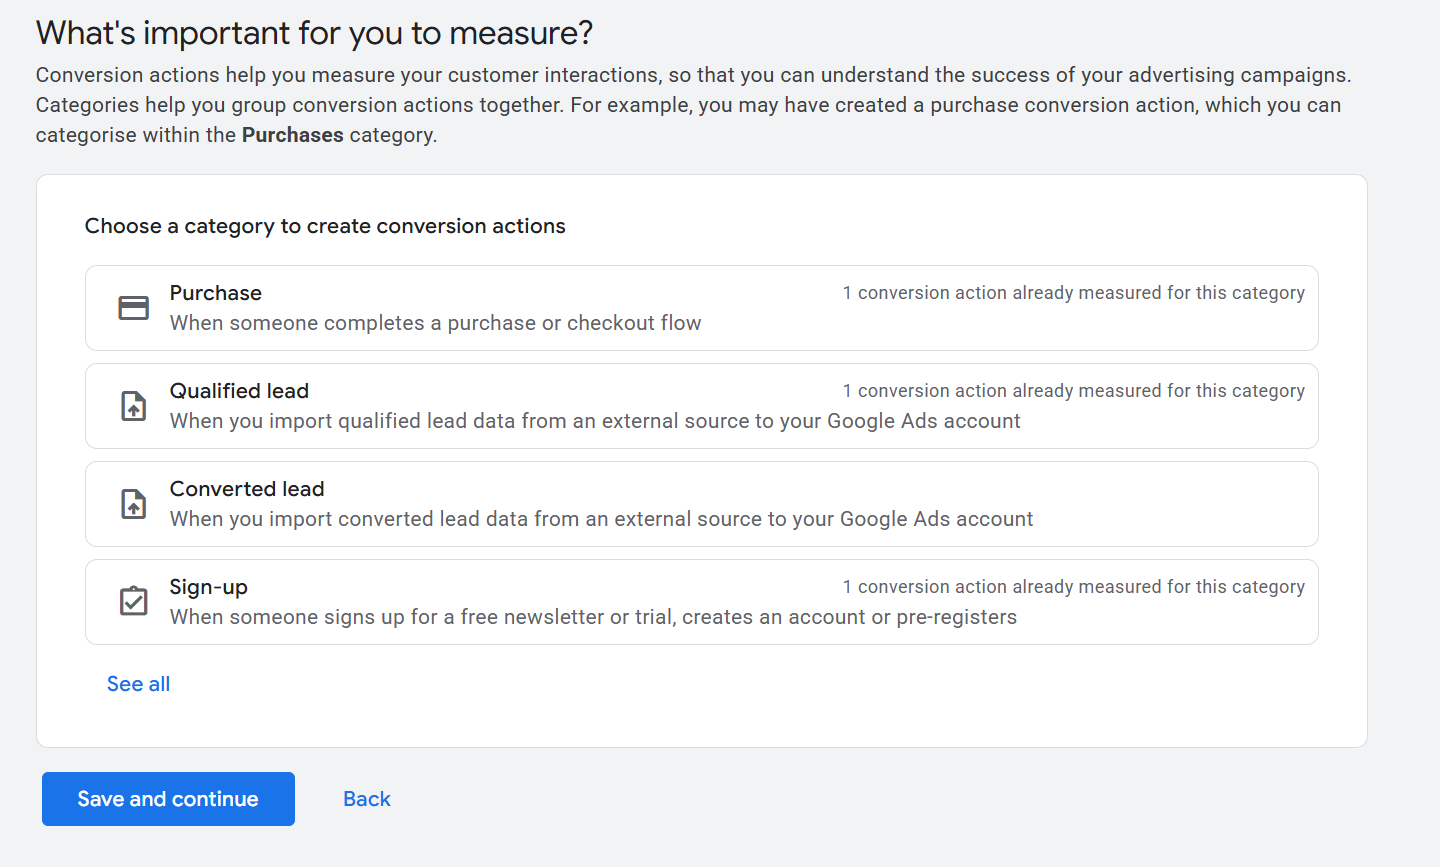
Then, click [+ Add conversion actions] and the "Connect data source later" option, as odd as that sounds:
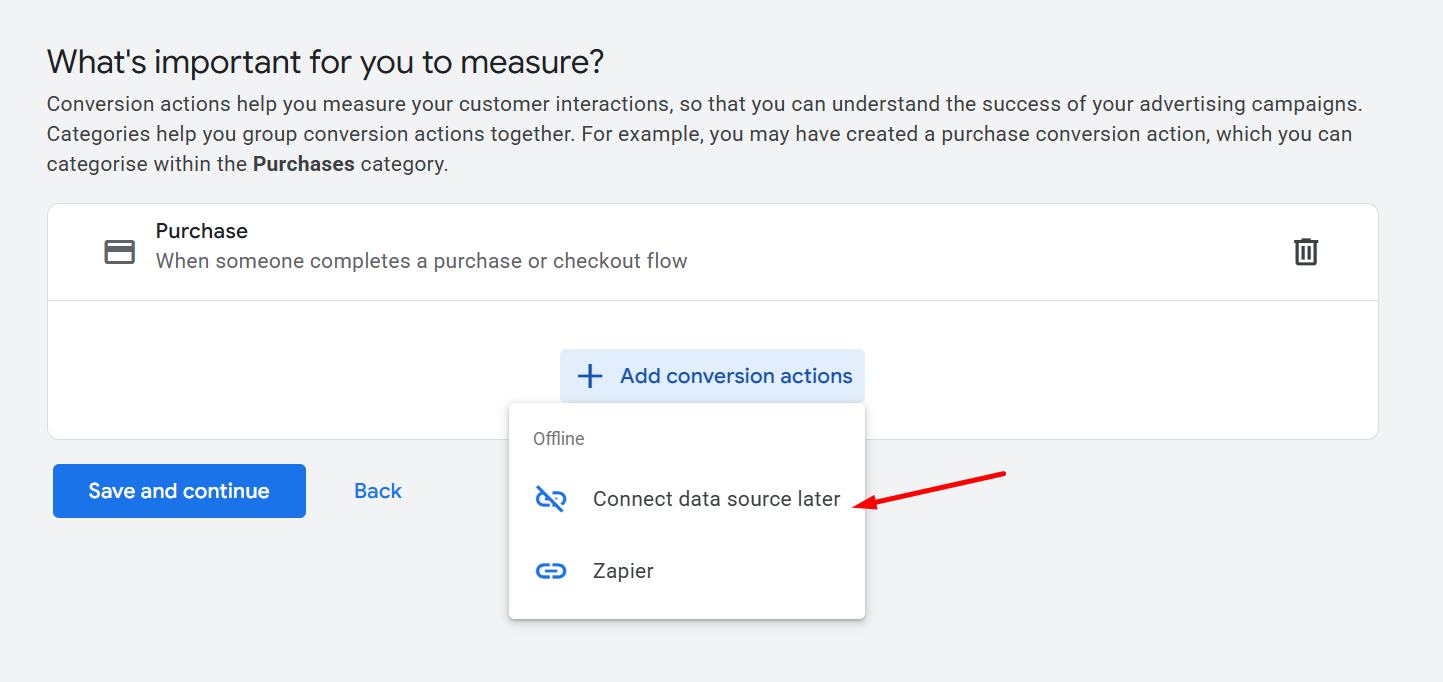
Once added you can click edit settings to bring up the conversion goal settings that you might be used to. Here you can name the conversion and set various options.
Make sure to set the count mode to "Every" else it will fail to track for events using Google's new wbraid/gbraid parameters.
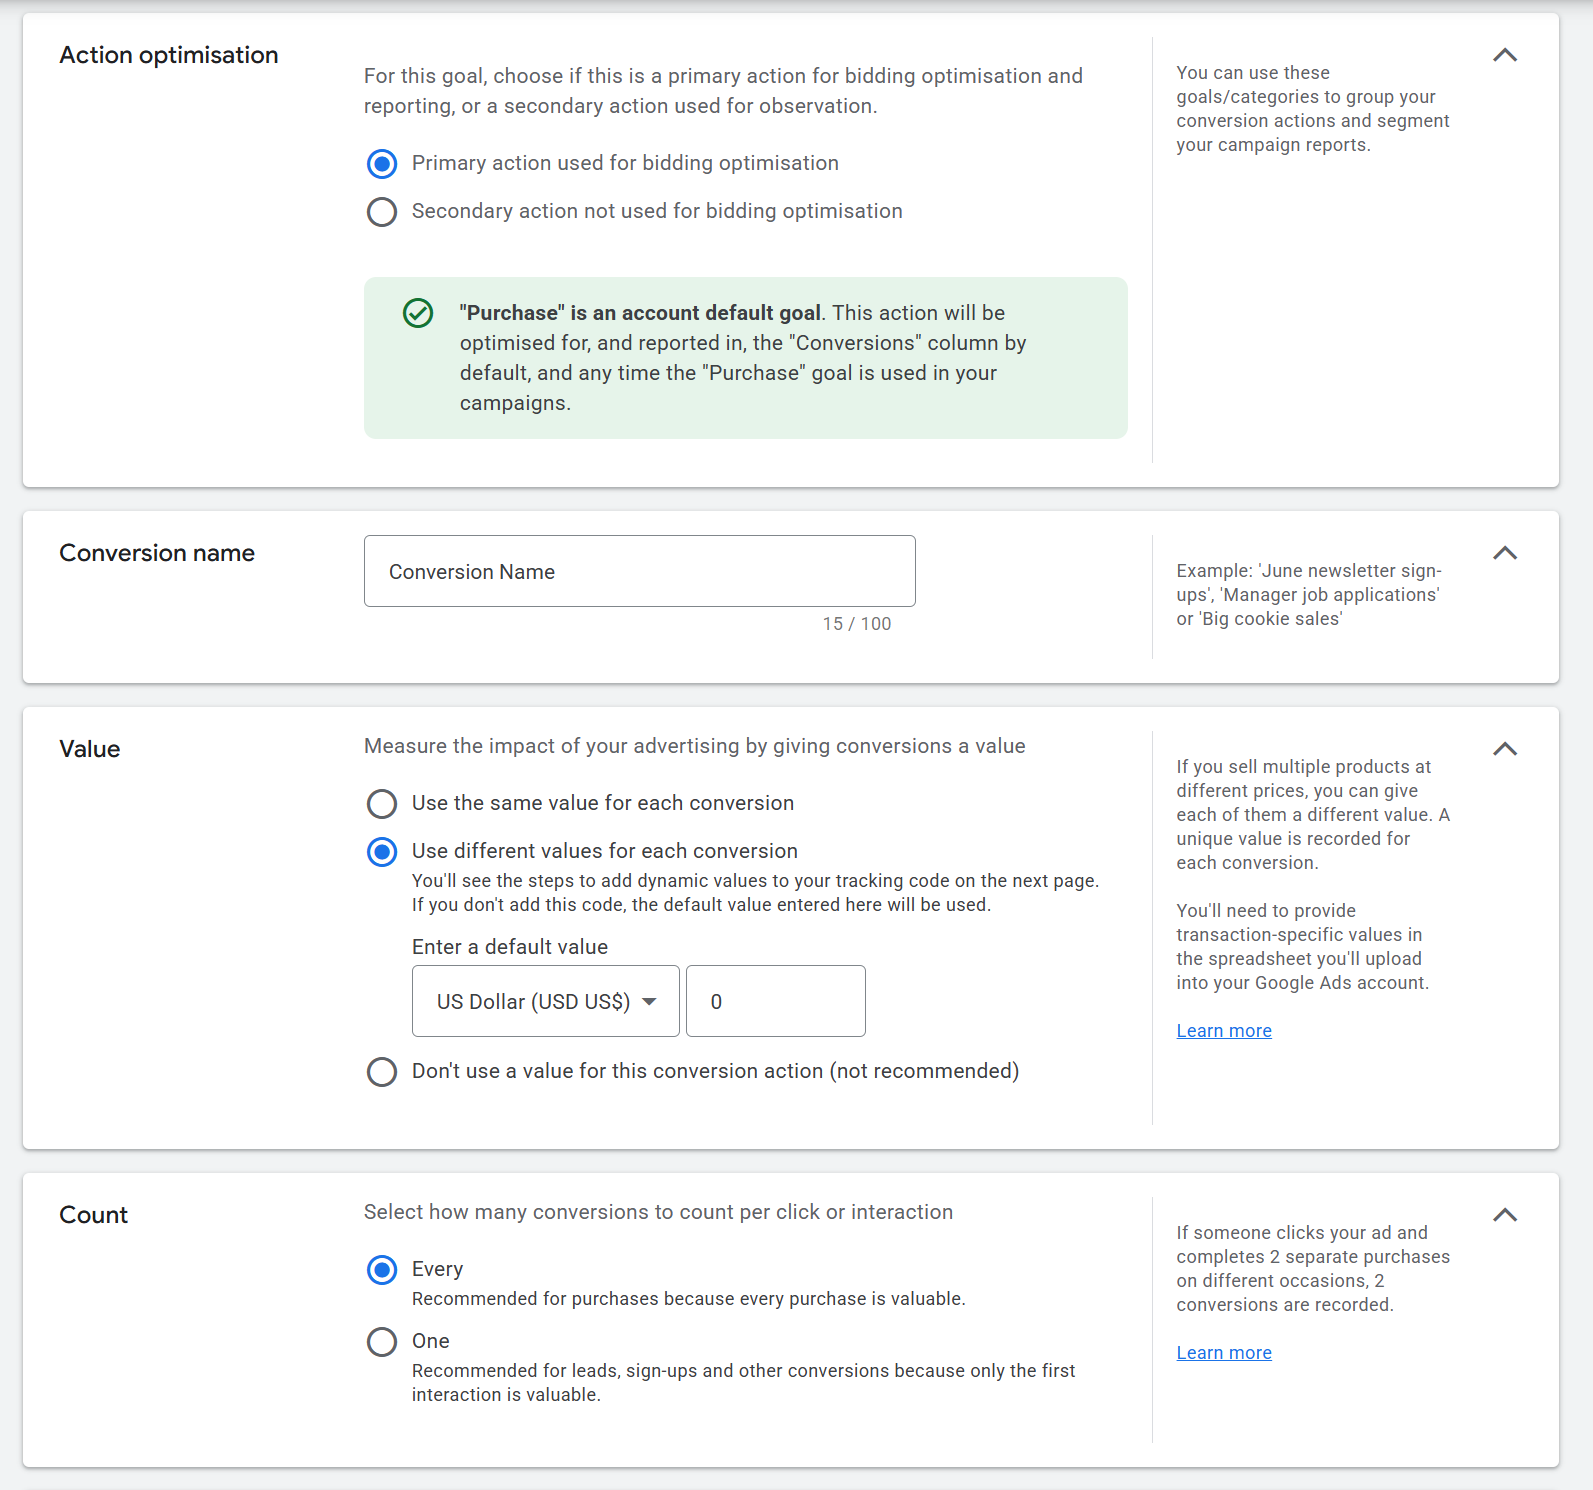
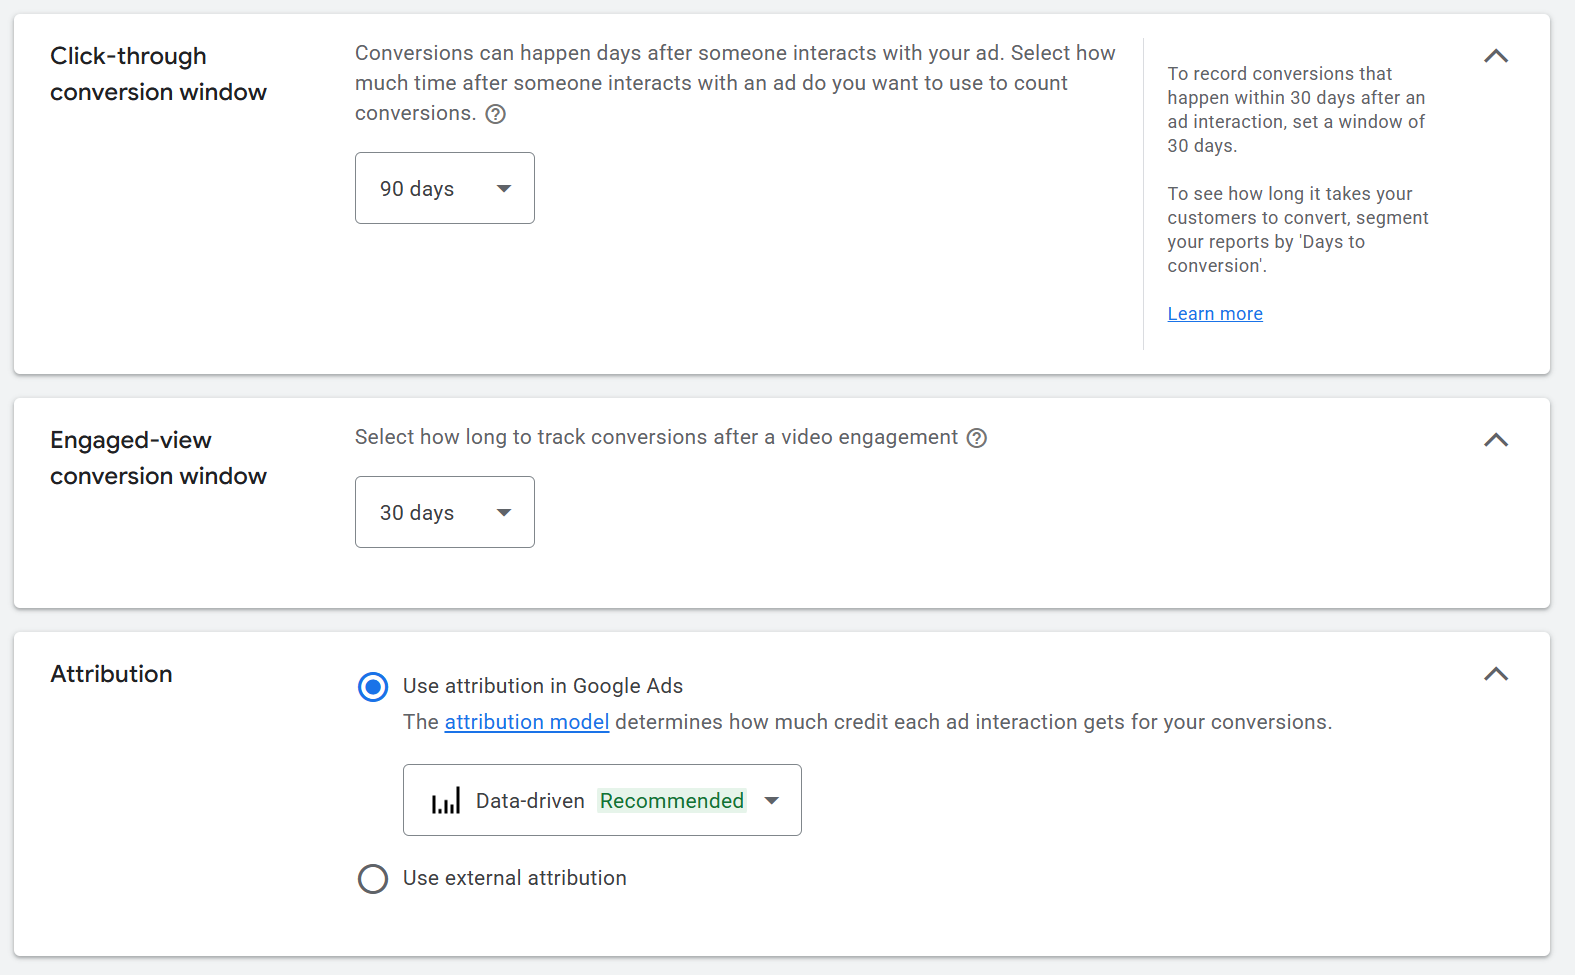
A few notes:
- Again, use the "Every" mode. Even if you would prefer unique counting, the trade off of many failed events via API is not worth it
- Make sure the goal is on primary mode for bidding optimisation if you want the ad delivery to be able to optimise towards this goal
- Select use different values per conversion and set a default of 0, so that the actual revenue can be set via API
- I would recommend wide attribution windows especially if your conversions can take a while
- Data driven is fine for attribution model but note it may split revenue between multiple ads (e.g. user clicked multiple ads, partial credit to each). It can also make attribution take a little longer in some cases, delaying how fast conversions appear in reporting.
Note in general, Google requires a minimum 6 hour delay between click and conversion upload. So even if your conversions happen minutes after the click, we cannot upload them until the click is 6 hours old.
Thus, conversion reporting will always be delayed -- this is a Google enforcement that cannot be side-stepped with API uploads.
Once out are all done, click save and continue and finish creating the goal.
Now, we need the conversion action ID for your custom scenario config. It's not stated clearly in the table, so we need to get it from the URL.
Click your conversion action's name (the blue text) to go to it's details, like below, where you can get the ctId value from the address bar, like so:

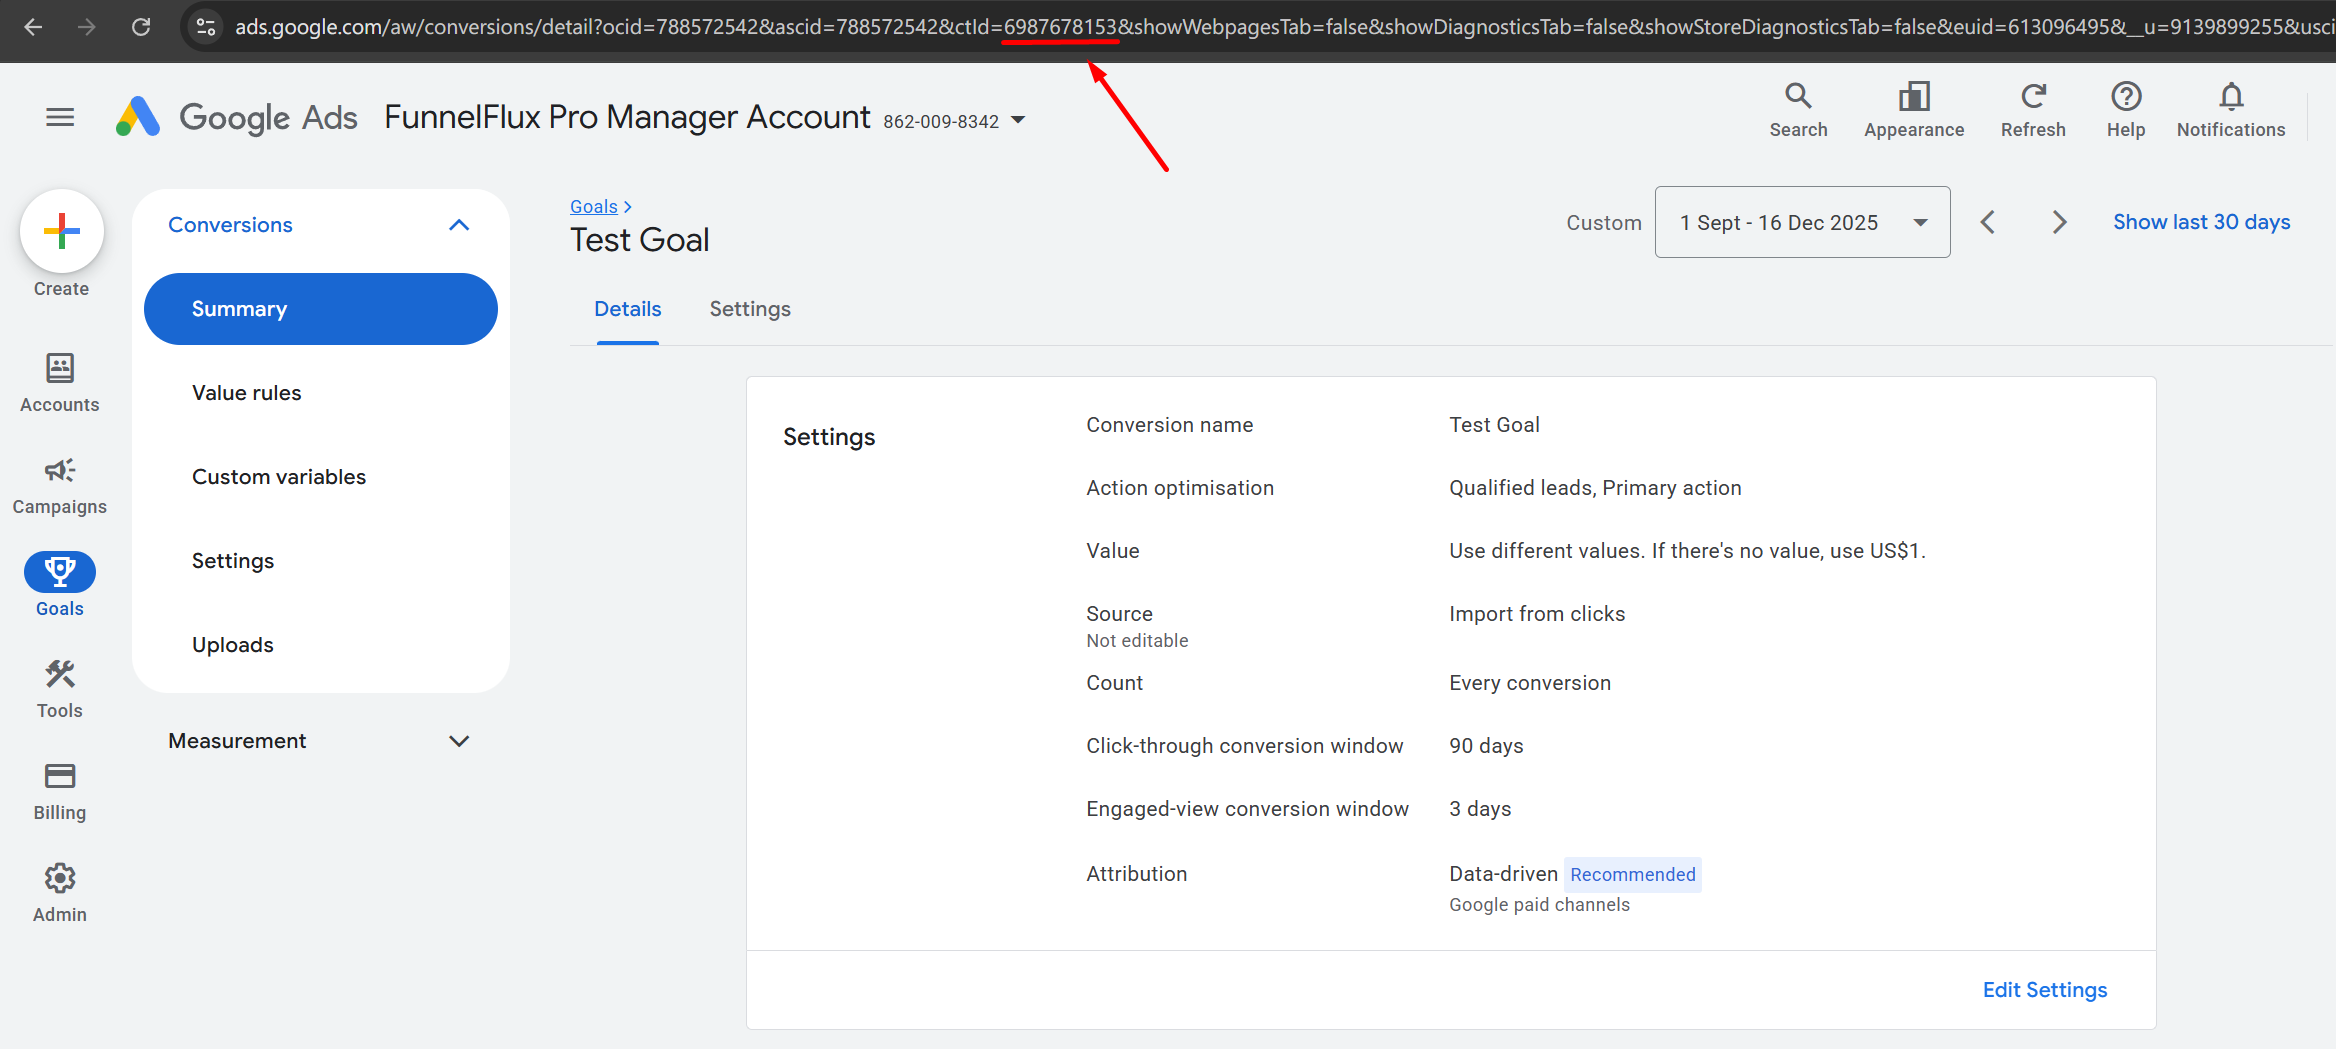
As above, my conversion action ID is 6987678153.
Refresh token
This is generated by our Google App.
To source this, go to the settings section in FunnelFlux > integrations. Here you can go through our authentication flow to give our app access to your ad account, and generate the needed token:
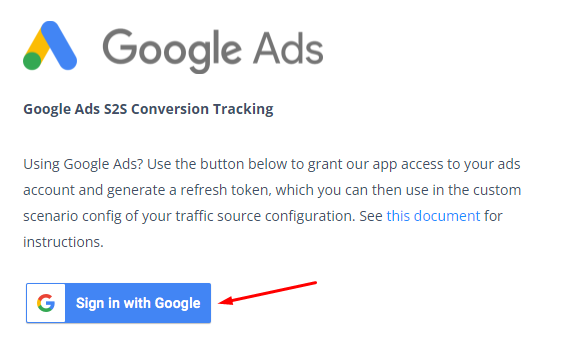
Click this, pick the relevant Google Account to sign in with, then click continue to approve access:
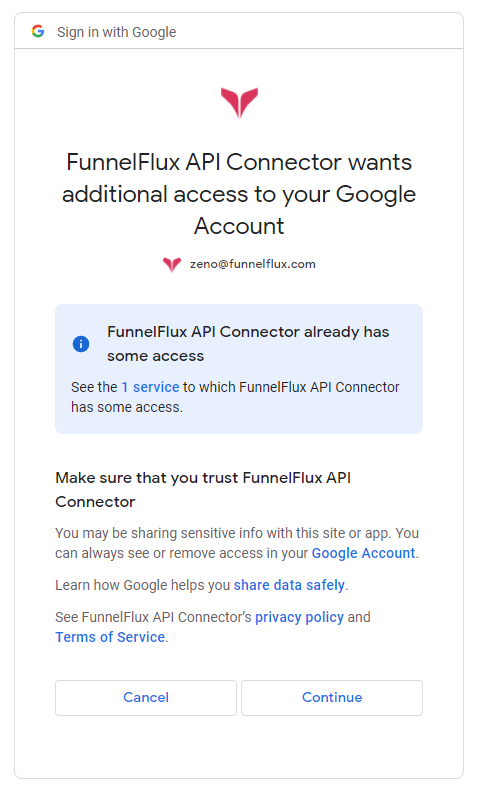
Once you continue, you will be redirected to a page where our integration provides a refresh token value:

Copy the full refresh token value and use that in the custom scenario config.
Now you should have all the values you need!
How the Integration Works
Firstly, our traffic source template has our external ID renamed to gclid with a blank placeholder, as below:
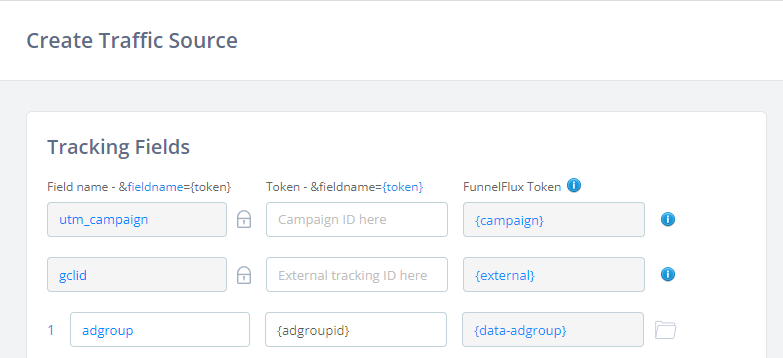
Because of this, when you generate tracking links, we will NOT append a gclid value (we don't want to as Google automatically adds this to click URLs), but if one is passed we will capture it as the external click ID parameter.
So, when users click ads, we capture that click ID, and when conversions happen, we can pass that click ID along with other data like the account ID, conversion action ID etc., to a conversion queue.
We then store a log of conversion data on our side and each hour a job runs that checks for conversions where the initial click time is >6 hours ago. If it is, we try to send it to your Google Ad account using all the data provided.
Note that we store your account IDs and corresponding refresh tokens separately from the conversion data, and its updated/checked when conversions happen.
Thus, if you ever need to update the refresh token you can do so, and eventually, it will process older conversions that may have been bouncing. However if the account ID is wrong at the time of conversion, you will need to ask us for help there, as it will be stuck forever in queue and unable to process.
Any other questions? Just reach out!


