

Prefer a visual guide? Watch the video below. Please note elements of our UI may have changed since the video's creation.
Landers are a lot like offers -- the key differences being:
- They don't directly convert and create revenue (though you can still see what revenue is associated with their visitors)
- They don't have an offer source, which would otherwise provide templating of data passing and conversion tracking config
But other than that, they are the same thing - a page, that you then use in funnels.
This is what an lander's config looks like:
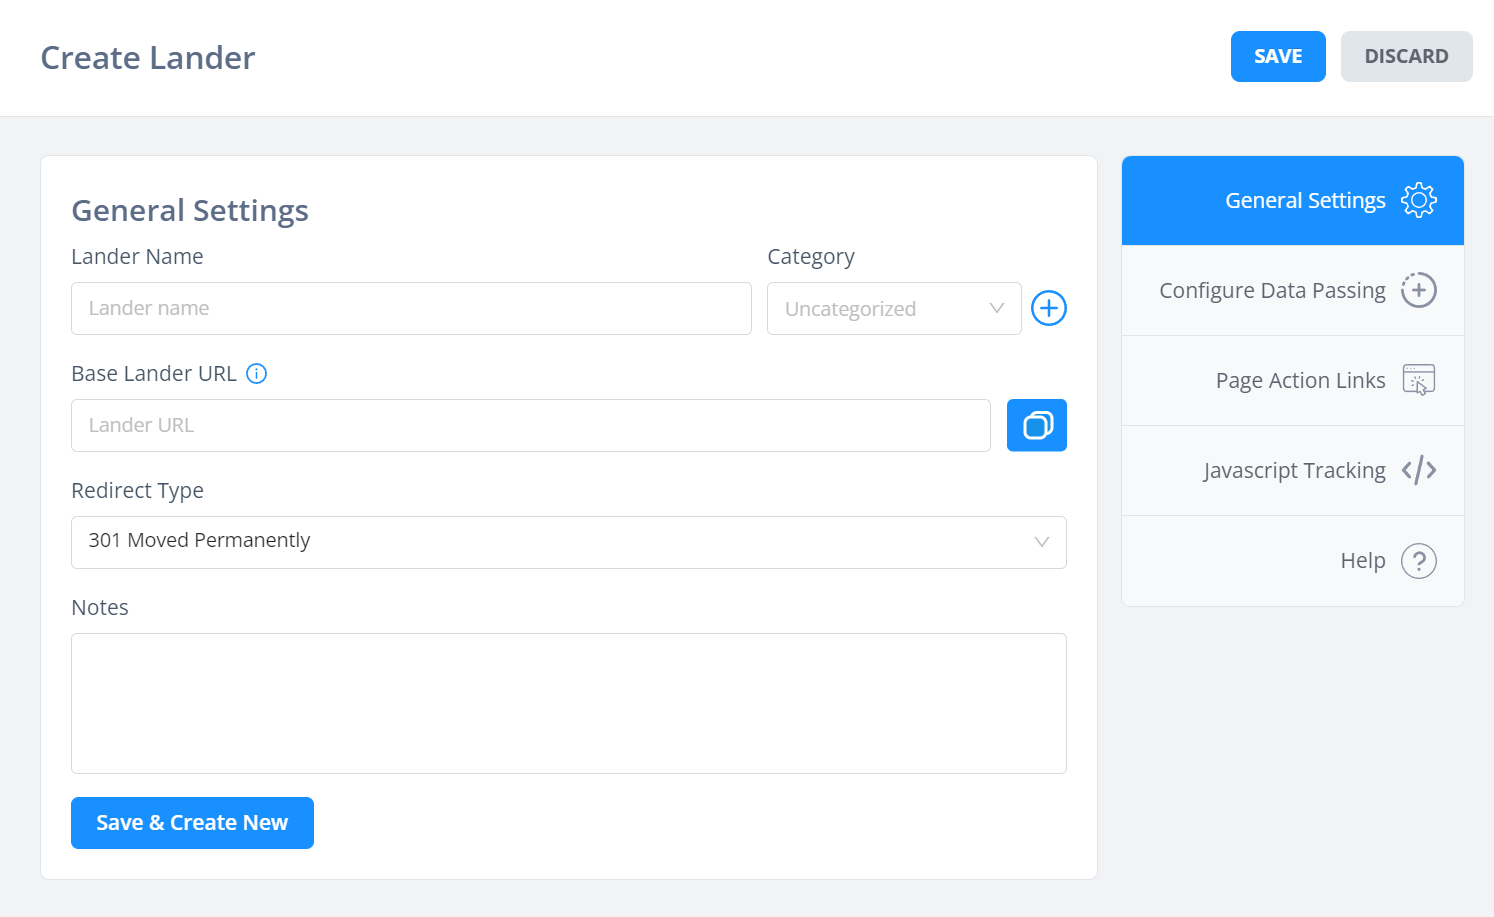
- Lander name is self explantory
- Category is for exactly that, categorisation. All your landers on the lander tab are shown within their categories, so use this for basic organisation. Note that categories for resources are entirely independent - so offer, lander, condition categories do not cross over.
- Base lander URL - here, put your lander URL, minus any query string parameters that you would rather pass in the Configure Data Passing section
- Redirect type - for landers, you will in most cases control the page and host/serve it yourself. Due to this, always use 301 or 307 modes. Do not use meta refresh modes for your own pages, as you will only slow down redirects while providing no value.
Configure Data Passing
Here, build the query string data you want to pass to your lander.
This section is purely for convenience, as its easier to type out field names and select tokens from dropdowns than it is to write a long-winded URL + remember the tokens from memory.
Plus, you're less likely to make mistakes like this, such as using an incorrect & or ? symbol in your URL.
Page Action Links
Here you can get the action links to use on pages.
These are what should be used on buttons/links that trigger a clickthrough to the next step of the funnel.
They will be of the format https://edge.funnelflux.pro/action/1
But they will use your custom domain.
Note these are universal, so you can use them on any/all pages. They simply state the action to perform.
Javascript Tracking
Here you can get the view tracking javascript code for this page.
The JS code used is universal tag, which you can also find on the settings > tracking codes page. It looks like this:
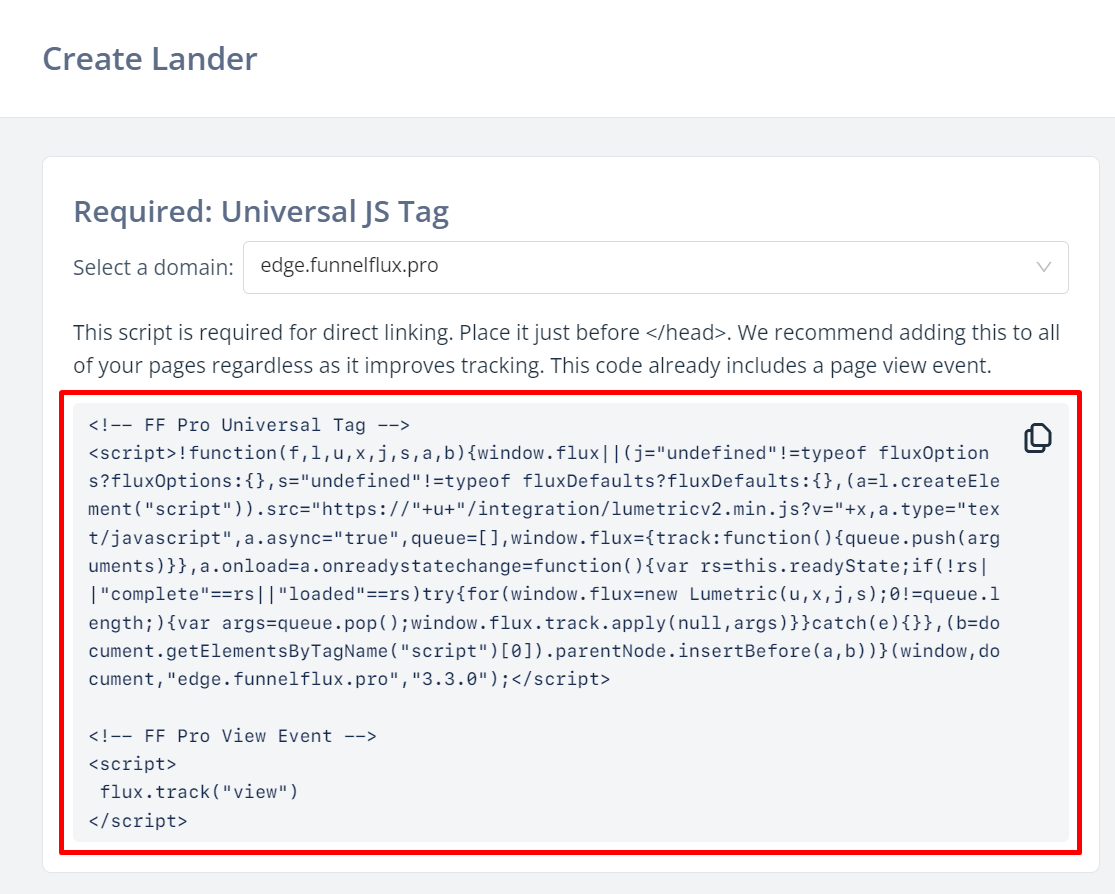
Simply add this entire snippet to your page and you're good to go.
The code is necessary for direct linking, but it also provides important helper functions that improve tracking overall.