

Google Tag Manager (GTM) is a powerful tool for managing various tracking scripts on your website.
This guide will walk you through the process of integrating FunnelFlux Pro with GTM for efficient tracking and analytics.
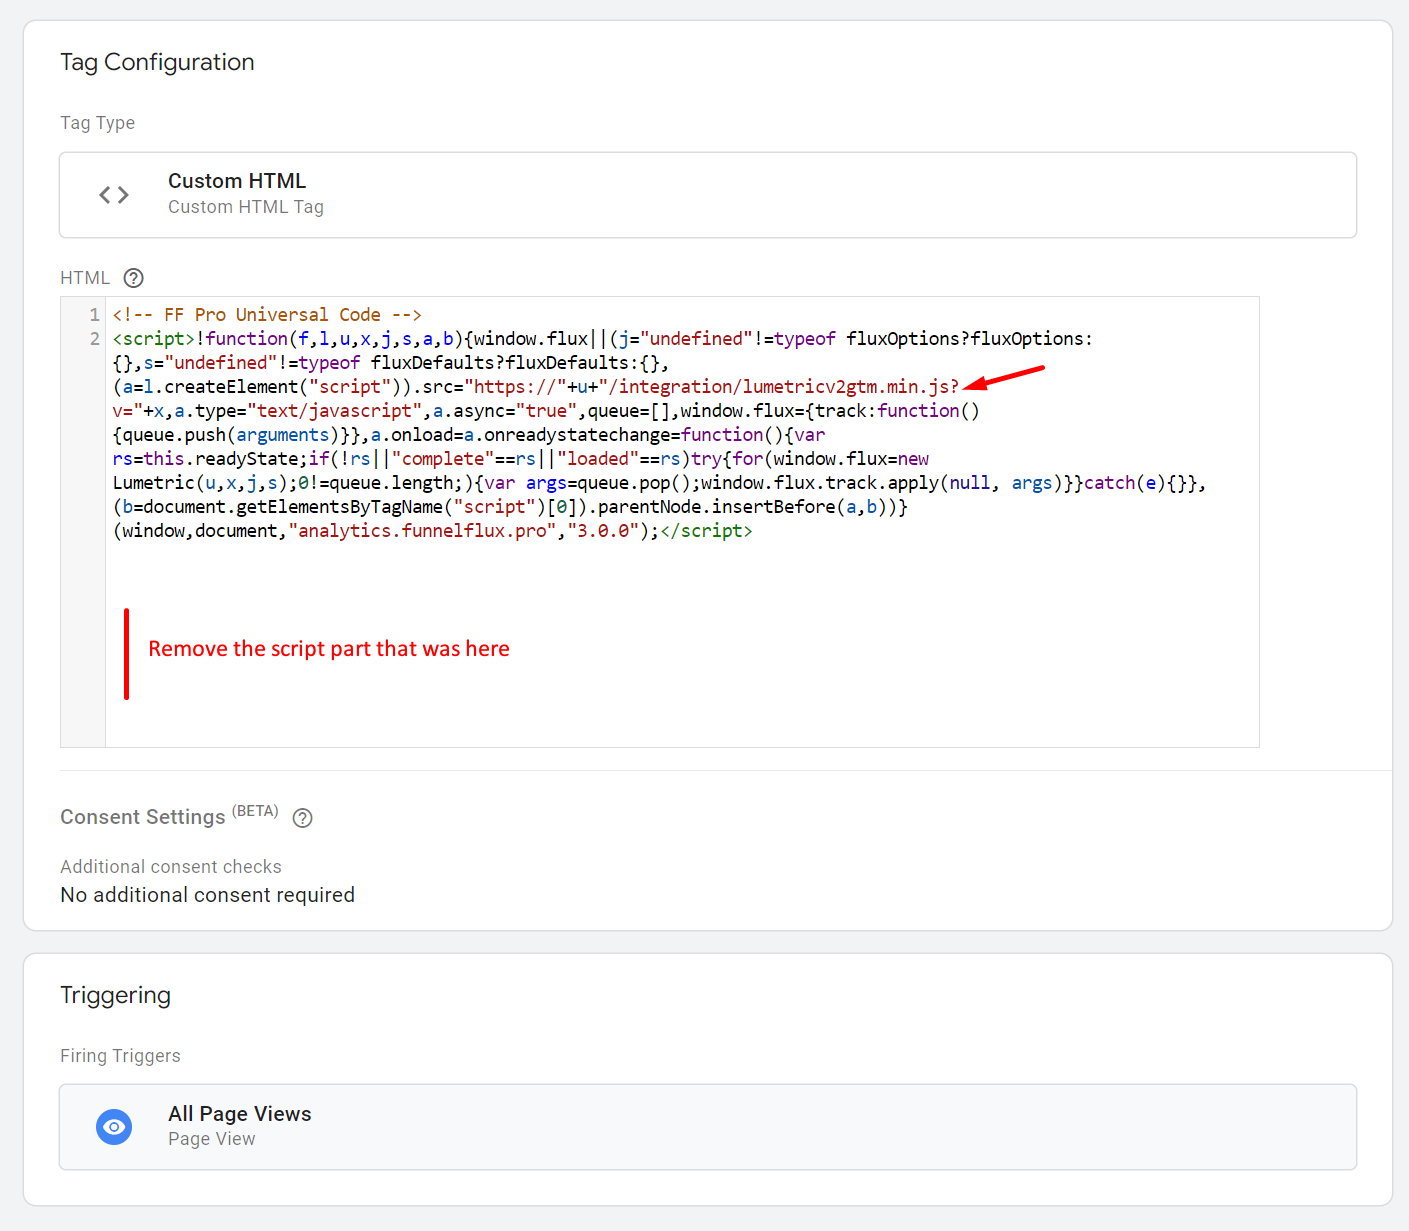
Step 1: Create the Universal FunnelFlux Pro JS Tag
- Log into your Google Tag Manager account
- Navigate to the "Tags" section
- Click "New" to create a new tag.
- Name the tag "Universal FunnelFlux Pro JS" (or a similar descriptive name)
- Choose "Custom HTML" as the tag type.
- In the HTML field, paste your FunnelFlux Pro universal JavaScript snippet.
- Modify the script source:
- Find the line referencing
lumetricv2.min.js - Change it to
lumetricv2gtm.min.js - This special version is optimized for GTM compatibility
- Lastly, remove the second <script> part where it has the flux.track event
- Find the line referencing
- Set the tag firing priority to 10 (this ensures it loads before other tags)
- In the triggering section, select "All Pages" to fire on every page load
So the tag at the end should look like this:
In this tag, if you would like to override defualt behavior with fluxOptions or set some defaults (e.g. default funnel to use for the site), you should add these here before the above content.
Step 2: Create Tags for Page View Events
For Page Views:
- Create a new tag named "FunnelFlux Page View"
- Choose "Custom HTML" as the tag type
- In the HTML field, add this code:
<script>
  flux.track("view");
</script>
Set the triggering to fire on "All Pages".
For Conversions:
- Create a new tag named "FunnelFlux Conversion"
- Choose "Custom HTML" as the tag type
- In the HTML field, add this code:
<script>
flux.track("conversion", {
  tx: "optional_transaction_id",
  rev: "conversion_value_here"
});
</script>
Then, set the triggering based on your conversion event (e.g., form submission, button click).
Step 3: Implement Forced Page IDs (Optional)
If you need to force specific page IDs for complex websites:
- Go to the "Variables" section in GTM
- Create a new "Lookup Table" or "Regex Table" variable
- Name it something like "FunnelFlux Page ID"
- Set up your table to map URLs or paths to your FunnelFlux page IDs
- In your "FunnelFlux Page View" tag, modify the code to use this variable:
<script>
flux.track("view", {
  p: "{{FunnelFlux Page ID}}"
});
</script>
Step 4: Test Your Implementation
- Use GTM's Preview mode to test your setup
- Navigate through your website and check that:
- The Universal FunnelFlux Pro JS tag fires on every page (when refreshing/loading)
- Page view events are correctly tracked
- Conversion events fire when expected
- Use the FunnelFlux Pro dashboard to verify that data is being received correctly.
Best Practices and Tips
- Always test thoroughly in a non-production environment before going live
- Use GTM's built-in debugging tools to troubleshoot any issues
- Regularly check your FunnelFlux Pro dashboard to ensure consistent data flow
- If you make changes to your website structure, remember to update your GTM configuration accordingly
- Consider using GTM workspaces for major changes to avoid disrupting live tracking.
By following these steps, you'll have a robust FunnelFlux Pro implementation using Google Tag Manager.
This setup allows for flexible tracking across your website while maintaining efficient tag management.