The funnel builder is the core visual editor in FunnelFlux.
Here, you can build and design all your funnels, controlling the logic that our servers use to process visitors.
Its best to think of a funnel as a decision-making flow chart -- because that's exactly what it is!
To get started you can add nodes by either right-clicking, bringing up the context menu:

Or, you can click "Add Nodes" and use our node palette:
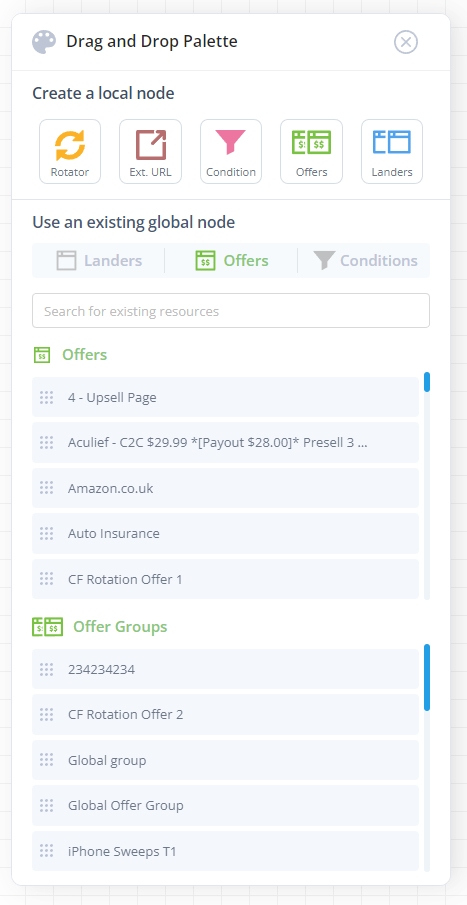
The node palette lists all your existing resources, so you can click between landers/offers/conditions and type to search. Then simply click and drag > drop these items onto the canvas.

Node types
There are currently five node types:
- Rotator (FYI the traffic node is a rotator)
- External URL
- Condition
- Offer Group
- Lander Group
Rotators
These can be used as many times as you want in a funnel to split traffic in multiple directions. You define the connections and the % weighting each connection has.
External URL
These are a simple node that send a user to a URL. These cannot have outgoing connections from them and should only be used if you want to bounce a user to some external URL where you have no control, e.g. redirecting blocked users to a special page, outgoing links to third-party sites that are not offers, etc.
Condition
These can be used to create rules for how you want to route users.
Every "route" you create is an outgoing connection that must exist from the condition.
So if you create two "routes" in the condition node, where they have certain rules in them, users would match those rules and eventually get sent down a specific route.
In the funnel builder, you need to click and drag from a condition node to connect these routes to destination nodes. Every one must have a destination, as the tracker must always be able to decide where to send someone.
Lander and Offer Groups
These are essentially the same -- they are a page group node that can have one or more pages inside of them.
If you want to split-test between multiple offers, you could add multiple offer nodes, each with one offer in them, or you could add a single offer group node and inside of its settings, you can add the many pages. It's up to you!
Inside these nodes you can set the rotation % between pages as well as various other options.

Building a funnel
After creating nodes, you need to connect them together.
Remember, this is a flow chart -- and a flow chart needs to have lines drawn between things to make sense.
With broken connections, the funnel may refuse to save, or if saved and used, it could result in errors with your links going nowhere.
To make connections, hover over the node. You will see multiple small handles appear:
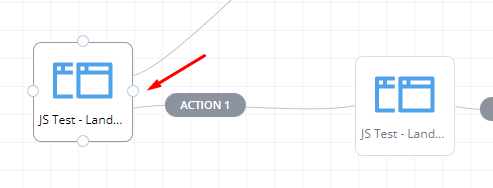
Click and hold on one of the handles then drag to another node and release. This will create a connection from node A > B.
Note that connections are uni-directional -- one-way. When you drag from A to B, the connection goes from A to B but not from B to A!
That connection will have a label in it, like Action 1 above. You can click and drag to move that label around, and you should be able to see the arrow for the direction of that connection.
Once you have wired things up, you can save your funnel at any time by clicking the save modal:
Note that changes to the funnel are ONLY saved when you click this button. When you click a page node for example > and it opens the settings panel, and you save this, you are NOT committing those changes just yet.
This is important, because if the funnel was saving with each action, it would often be broken as you are mid-changes and while doing that, tracking links might break. So it only commits changes to our backend when you save the complete funnel above.

Generating Links
When you want to send traffic to your funnel, you do so by generating links.
You can generate a link to send a user to any point of the funnel, though you'd usually use the traffic node.
Click it > it will open the settings. From here you can click redirect links and choose a source, then get a link:
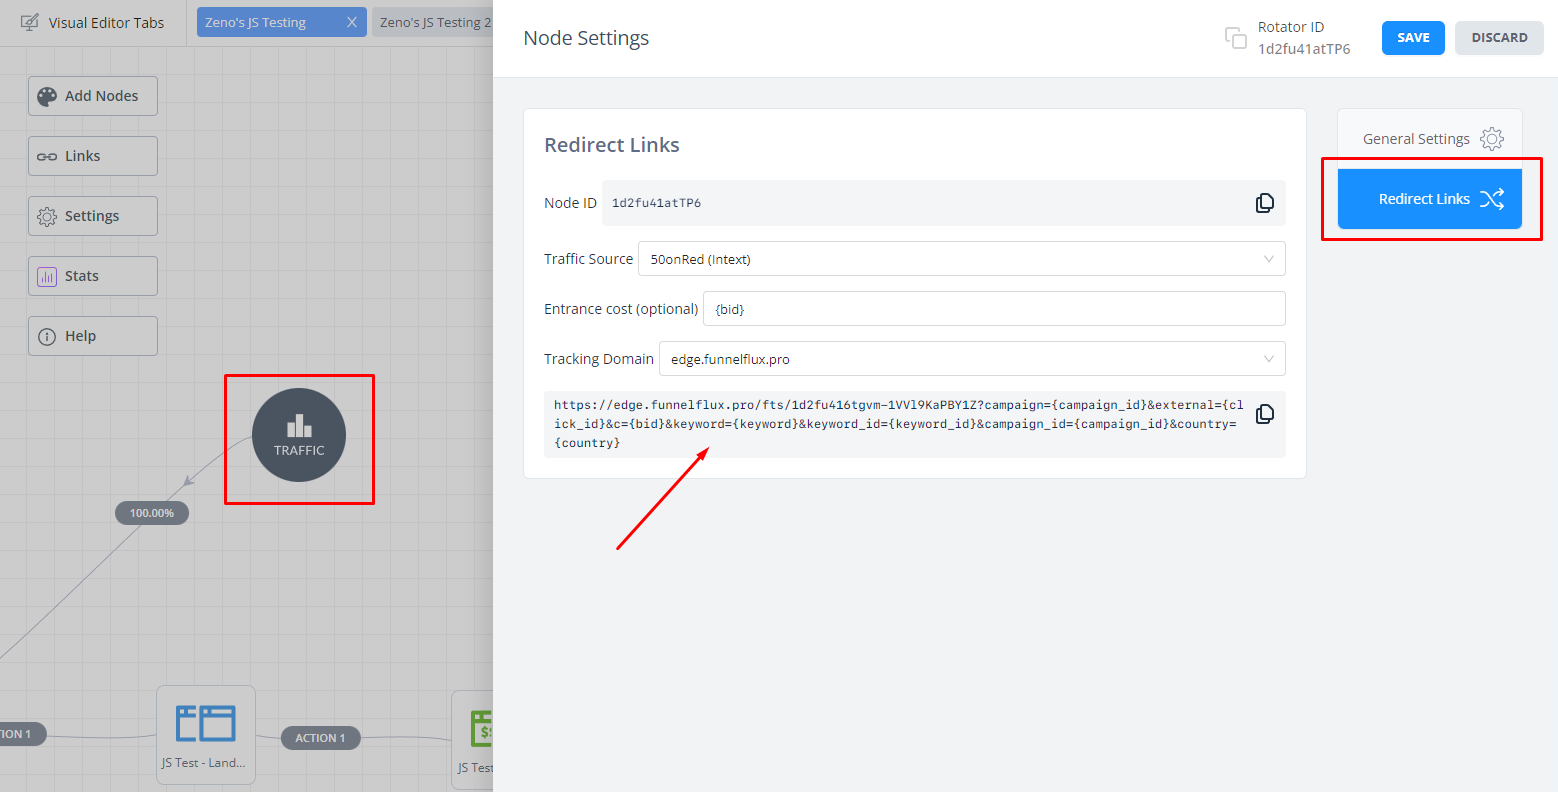
This is a Redirect Link - a link that goes to our servers, the tracker then decides where to send the user.
Note you do not need to save these links. This is just a link generator. When you close this panel and open it again, it will have reset.
Links in FunnelFlux are dynamic and can be generated at any time -- they depend on the funnel and traffic source and do not have some unique hash or ID in them per link that needs to be saved.
In some traffic sources you will not be able to use redirect links, or it may be best to avoid them (e.g. Google Ads, Microsoft Ads, Facebook).
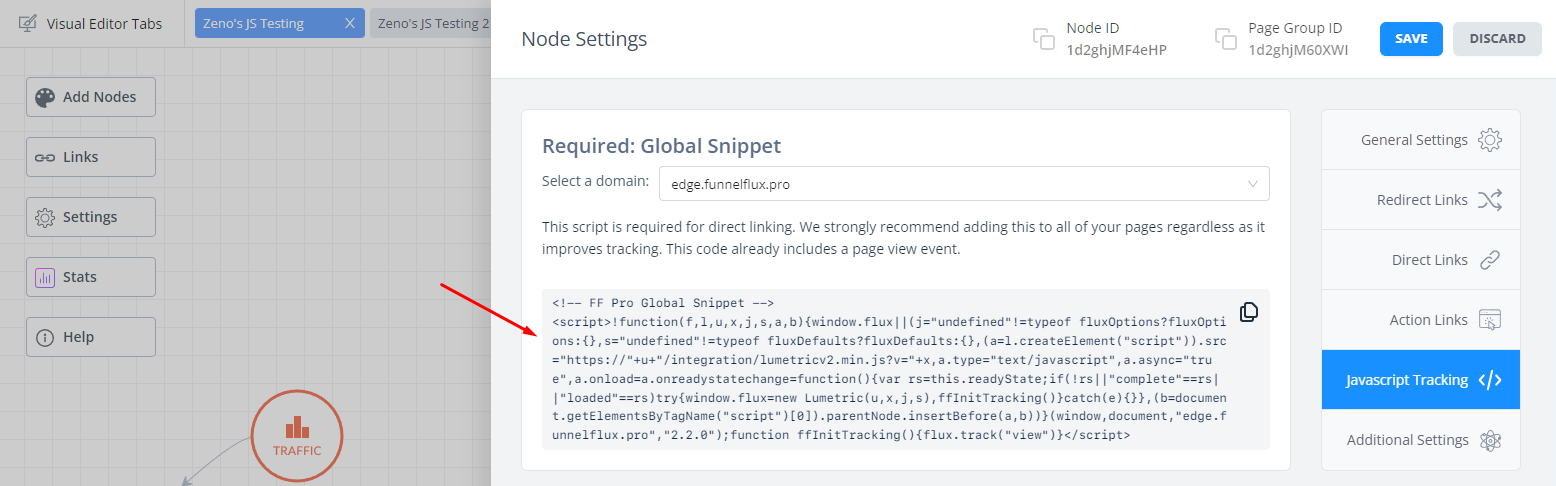
In that case, you can generate a Direct Link that goes straight to a page but appends URL data for our Javascript to receive.
These are only available if you click a page group:

For a traffic source like Google Ads, you would use the "Base Page URL" as your ad URL, then put the "URL suffix" we give you in the optional suffix settings. This is a common ad configuration pattern that exists in multiple traffic sources.
On loading the ad, the result is a user would load the full direct URL, go to your page, and our Javascript would log their visit + their URL data.
Incidentally, you can get our Javascript on the corresponding tab, and should put this on all pages you control, whether you are using redirect or direct links. It has important functions that improve tracking in all cases:

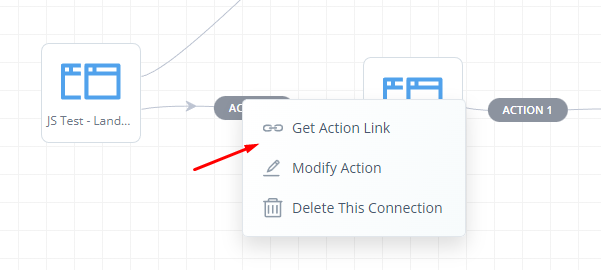
Action links - for page clickthroughs
If you have any page where a clickthrough will happen, this will be what we call an "action".
You may notice in the funnel builder that the outgoing connections from page nodes have labels saying Action 1, Action 2, etc.
When users get to one of these nodes, the next step is to tell the tracker "execute action 1" or similar. A very generic instruction!
This is so the tracker, knowing the user and where they are, can decide where the user should go next.
To do this you need an action link. You can get one by clicking the action links tab in the page settings, or right click the connection > get action link:
This will bring up an action link modal:
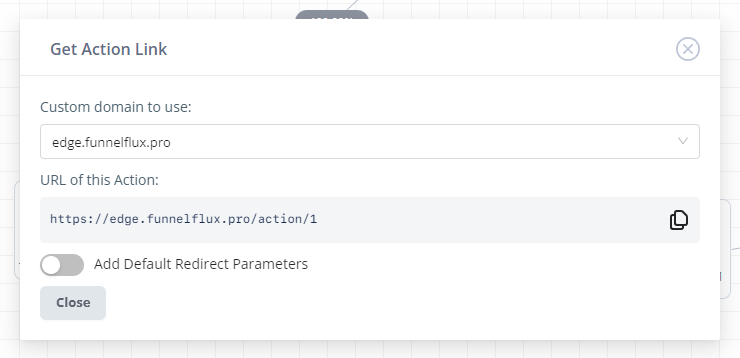
You can see this link is very generic, i.e. it is DOMAIN/action/number
Here you can also toggle on default redirect parameters, but this is not needed in most cases, so you can ignore it for now.
Take these links and use them for your call to action buttons on pages, or any other links where you want FunnelFlux to track the click and control where the user will be sent.
Local vs Global Nodes
One last thing -- you may have noticed in the node palette that the terms "local" and "global" are used:
Local means something that exists only in this funnel, whereas global implies the configuration/settings exist outside of the funnel.
When you drag and drop from the local node list, or right-click > add node, you are creating a local node that only exists within this funnel.
The same is true when you drag and drop offers or landers from the list.
However, you also have lists with Global Lander Groups, Global Offer Groups and Global Conditions.
These are items that exist outside of funnels (there is a page groups and conditions page in the app).
When you drag and drop these, you create a node as usual, but its settings are linked to an item outside of the funnel.
In this way, you can reuse these groups/conditions in multiple funnels and their configuration is shared. Change the item in one funnel (or on their respective page) and it will impact all funnels that use them.
These global resources are useful for things you want to use repeatedly -- like a condition for routing desktop and mobile, or bouncing a list of flagged ISPs, or a global list of "top X offers" that you want to adjust over time and have that change propagate to all funnels.
Imagine if you had 20 funnels all using the same list of current top-performing X offers, and if you needed to remove an offer, you had to edit each node manually in every funnel!
That's all for this intro to the funnel builder.
As usual, reach out if you have any questions.